
Cheesy Smashed Broccoli is the ultimate side dish or snack for any occasion, and takes simple broccoli into something extraordinary. With crispy golden edges, a gooey layer of melted cheese, and a soft, tender bite inside, it’s a mouthwatering twist on a classic veggie. This dish proves that healthy food can be just as satisfying and comforting as your favorite comfort snacks.

If you thought broccoli was boring, wait until you try this cheesy version! It’s perfect for family dinners, game nights, or when you want a quick yet impressive appetizer. Packed with flavor and crunch, Cheesy Smashed Broccoli is the kind of recipe that turns everyday ingredients into something truly special.
What is Cheesy Smashed Broccoli?
Cheesy Smashed Broccoli takes its cue from the popular smashed potato trend, but with a fresher, lighter spin. Instead of roasting whole florets, each piece of broccoli is gently pressed down. This simple step helps the edges spread out, allowing them to roast evenly and turn beautifully crisp in the oven.
When it comes to texture, Cheesy Smashed Broccoli truly shines. The flattened edges bake until golden and crunchy, while gooey cheese melts into every little crack and corner. At the same time, the inside of the stem stays soft and tender. This mix of crispy and creamy textures makes every bite exciting and satisfying.
It is no surprise that Cheesy Smashed Broccoli has become a hit on social media platforms like Tik-Tok and Instagram. Home cooks love sharing quick, fun recipes that look impressive but are easy to make. Broccoli gets a playful upgrade that is colorful, eye-catching, and perfect for sharing online.
Swapping broccoli for potatoes or other starchy vegetables also makes this dish a smart choice. It works well for vegetarians and anyone aiming for low-carb or healthier meals. You still get bold flavor and comfort, but in a lighter, more nutritious way.
Why You’ll Love This Recipe
- Quick and Easy to Make: Cheesy Smashed Broccoli comes together fast with just a handful of basic ingredients. The steps are simple and beginner-friendly. It comes together fast, making it ideal for busy days.
- Perfect for Any Occasion:- This dish works great as a casual weeknight side and also fits well on a holiday table. It feels special and comforting without being hard to prepare. You get big flavor with minimal effort.
- Kid-Friendly and Fun: Cheese makes broccoli more appealing to kids who usually avoid vegetables. The crispy edges and melty topping feel familiar and comforting. It is a simple and effective way to win over even the pickiest eaters.
- Easy to Customize: You can change the cheese, spices, or toppings to suit your taste. Add chili flakes, garlic, or herbs for variety. Cheesy Smashed Broccoli adapts easily to different flavor preferences.
- Nutritious Yet Comforting: Broccoli adds fiber, vitamins, and essential nutrients to the recipe. The cheese contributes protein and calcium. Together, they create a healthier version of comfort food.
- Great Texture in Every Bite: The crispy edges contrast beautifully with the soft, tender center. Melted cheese fills the cracks for extra flavor. This texture balance keeps the dish exciting.
- Low-Carb and Vegetarian-Friendly: Using broccoli instead of starchy sides makes this recipe a healthier option. It fits well into low-carb and vegetarian meal plans. Cheesy Smashed Broccoli still feels filling and satisfying.
- Visually Appealing on the Plate: The golden, cheesy finish looks inviting and appetizing. It adds color and charm to any meal. Even simple dinners feel more special when served with this dish.
Read More: Crispy Smashed Potatoes With Cheese
Ingredients You’ll Need
- Fresh broccoli florets – The highlight of the recipe — pick medium florets to help them hold their shape and crisp up beautifully.
- Olive oil or butter – This step makes the broccoli crisp and enhances its flavor; olive oil adds a lighter feel, while butter gives it a creamy, indulgent twist.
- Garlic powder – Adds delicious savory depth effortlessly; for a sharper flavor, try using fresh minced garlic.
- Salt and pepper – basic seasoning to let the natural broccoli flavor shine.
- Cheese (Cheddar, Mozzarella, or Parmesan) – choose your favorite melt: cheddar provides bold flavor, mozzarella provides gooey stretch, Parmesan adds sharpness.
- Optional toppings: chili flakes for heat, lemon zest for brightness, or breadcrumbs for an extra crunch layer.

How to Make Cheesy Smashed Broccoli (Step-by-Step)
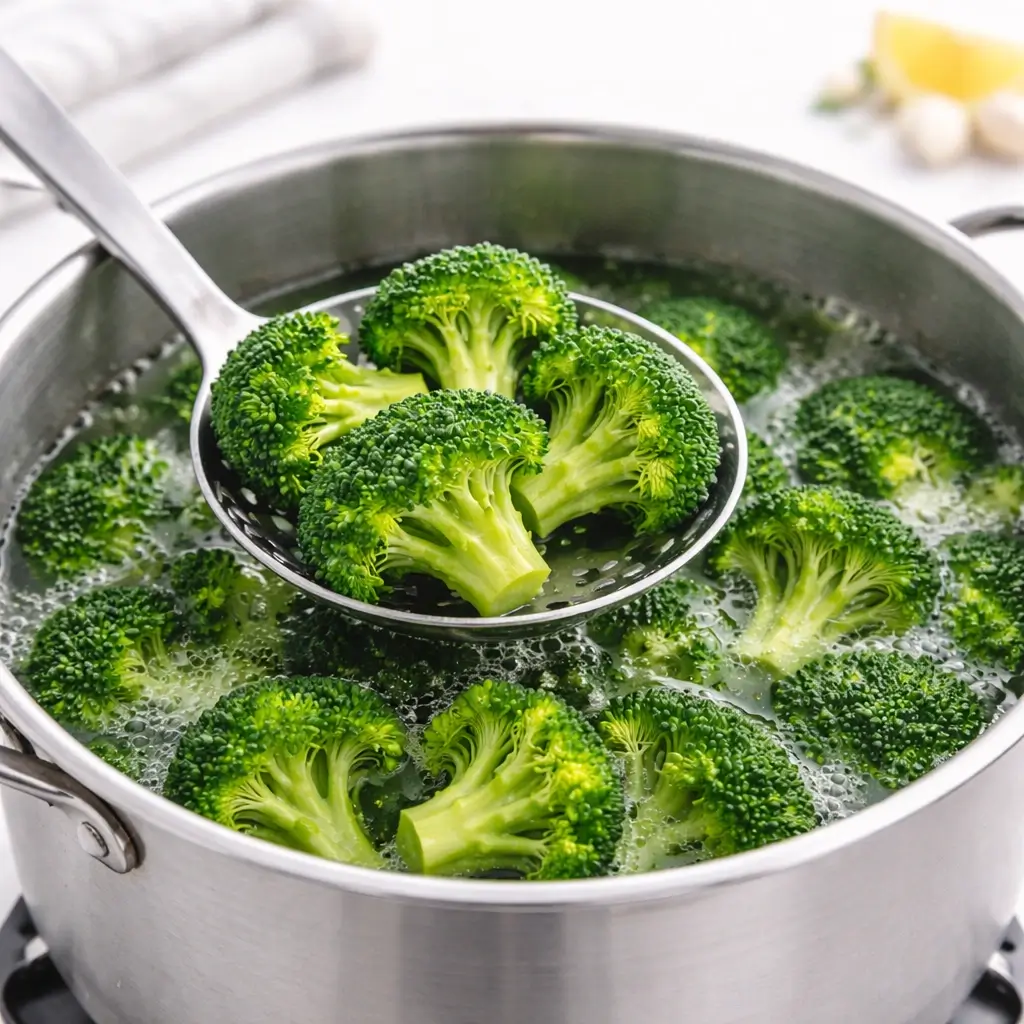
Step 1: Prep and Boil the Broccoli
- Wash the broccoli florets well after trimming to ensure they’re free from any grit. Choose medium-sized pieces so they smash easily.

- Bring a pot of salted water to a boil (or prepare a steamer) and cook the florets until they are just tender—soft enough to flatten, but still firm so they don’t turn mushy.
Step 2: Smash the Broccoli
- Preheat your oven to a high roasting temperature. Arrange the cooked broccoli on a baking sheet lined with parchment paper.

- Use the bottom of a glass (or a sturdy spatula) to gently press down each floret until it flattens and spreads slightly. Try to keep each piece whole; the goal is a firm center with deliciously crunchy edges.

Step 3: Season
- Drizzle the flattened broccoli with olive oil or melted butter.

- Then sprinkle garlic powder, salt, and pepper evenly over all the florets. Ensure each pressed piece gets its share of seasoning for a uniform, tasty result.

Step 4: Roast
- Place the baking sheet in the preheated oven and roast until the edges of the broccoli begin to turn golden brown and crispy. Baking time can range from 15 to 20 minutes, depending on your oven and the thickness of the pieces. You’re looking for a brown and crisp texture.

Step 5: Add Cheese
- Remove the baking sheet briefly. Sprinkle your shredded cheese of choice over each smashed broccoli piece. Ensure the cheese touches every edge, so it melts evenly over the crunchy parts.

9. Return the sheet to the oven and bake a few more minutes until the cheese is melted, bubbly, and beginning to turn lightly golden.

Step 6: Serve Hot
- Once the cheese is bubbly and the broccoli crisped to perfection, take it out.

- Garnish with your choice of herbs, lemon zest, chili flakes, or breadcrumbs. Serve warm for the best crunchy and melty experience.

Expert Tips
- Cook Broccoli Just Until Tender: Avoid overcooking the broccoli before baking. It should be fork-tender but still firm enough to hold its shape. This helps Cheesy Smashed Broccoli stay intact when smashed and bake up nicely.
- Prep the Pan Properly: Line your baking tray with parchment paper or lightly grease it with oil. This prevents sticking and makes cleanup quick and easy. A well-prepared pan also helps the broccoli crisp evenly.
- Mix and Match Cheeses: Using a blend of cheeses adds more depth and texture. Try combining sharp cheddar with mozzarella for melt and stretch. This simple swap makes Cheesy Smashed Broccoli even more flavorful.
- Broil for Extra Crispiness: For crispier edges, switch to the broiler for the last 1–2 minutes. Keep a close eye so it doesn’t burn. This step gives the dish a golden, restaurant-style finish.
- Finish with Fresh Lemon Juice: A light squeeze of lemon juice just before serving brightens the flavors. It helps reduce the heaviness of the cheese and brings balance. This small touch lifts Cheesy Smashed Broccoli beautifully.
- Season Generously Before Baking: Don’t be shy with salt, pepper, and spices before baking. Proper seasoning brings out the natural flavor of broccoli. You can also add garlic powder or chili flakes for extra punch.
- Smash Gently, Not Too Flat: Press the broccoli just enough to spread it out without breaking it apart. Gentle pressure keeps the florets intact while creating crisp edges. This ensures the best texture in every bite.
Variations to Try
- Spicy Sriracha Broccoli: Add heat by drizzling sriracha or your favorite hot sauce after the cheese melts. You can also mix the sauce in before roasting for a deeper flavor. This version gives Cheesy Smashed Broccoli a bold, spicy kick.
- Garlic-Parmesan Style: Use Parmesan instead of regular cheese and mix in fresh garlic for a classic Italian touch. You can mix the garlic in before baking or sprinkle it on once the cheese melts. This variation makes the recipe rich and aromatic.
- Buffalo Broccoli Bites: Coat the smashed broccoli with buffalo sauce before or after baking. Finish with blue cheese crumbles if you like strong flavors. It turns Cheesy Smashed Broccoli into a game-day–style snack.
- Bacon Cheddar Smash: Top the melted cheese with cooked, crumbled bacon for smoky flavor. The bacon adds crunch and richness to every bite. This version feels extra indulgent and satisfying.
- Vegan-Friendly Option: Choose vegan cheese or nutritional yeast as a dairy-free alternative. Cook with olive oil instead of butter for a plant-based approach. It keeps the dish flavorful and inclusive.
- Lemon-Herb Broccoli: Add fresh herbs like parsley or thyme and finish with a squeeze of lemon. The herbs add freshness while the lemon brightens the flavors. This variation feels light and refreshing.
- Cheesy Pesto Smash: Drizzle pesto over the broccoli before baking or swirl it into the cheese. The basil and garlic notes add depth and color. It’s a flavorful way to change things up.
Service Suggestion
- Enjoy grilled chicken or salmon for a balanced plate of protein and veggies.
- Mix into pasta or rice bowls where the broccoli adds texture and cheesy flavor.
- Serve alongside burgers or sandwiches as a lighter yet flavorful veggie side.
- Make it a crowd-pleasing appetizer at your next party, paired with dips like ranch or spicy mayo.
Storage and Reheating
- Refrigerate: Store leftover pieces in a sealed container in the refrigerator for up to 2–3 days. They might lose a bit of crispness, but they will still taste great.
- Reheat: For a crispy finish, warm in the oven or air fryer until the edges crisp up. Microwaving isn’t ideal, as it tends to make broccoli limp.
- Freeze: Freezing and then thawing smashed, cheesy broccoli isn’t recommended, as it often becomes mushy and loses its crispy edges. It’s best enjoyed fresh for the perfect texture.
Common Mistakes to Avoid
- Overcooking the Broccoli: Cooking the broccoli too long during boiling or steaming makes it too soft. When smashed, the florets might break down and turn soft in the oven. Aim for just-tender broccoli that still holds its shape.
- Using Too Much Oil: A heavy coating of oil can ruin the texture. Instead of crisp edges, the broccoli may become greasy and soggy. A small drizzle is enough to help it roast and brown properly.
- Crowding the Baking Sheet- When broccoli pieces touch or overlap, steam builds up. This prevents crisping and leads to softer results. Give each floret enough space so it can roast evenly.
- Adding Cheese Too Early: Placing the cheese on at the beginning can cause it to burn before the broccoli is done. It may also overcook the vegetables. Wait until the right moment so everything finishes perfectly.

Frequently Asked Questions
Q1: Is it okay to make this recipe using frozen broccoli?
Yes, but make sure to thaw it and pat it dry thoroughly. As frozen broccoli thaws and cooks, it can release moisture that stops the edges from crisping.
Q2: What temperature should I roast at?
A good starting point is around 425 °F (220 °C). Adjust the oven temperature slightly if necessary; higher heat ensures the broccoli becomes nicely crisp.
Q3: Can I skip the cheese for a dairy-free version?
Absolutely. Skip cheese and consider using nutritional yeast or a dairy-free cheese alternative for that cheesy flavor.
Q4: How do I ensure the broccoli gets crunchy edges?
Arrange the florets flattened and spaced apart on the tray, lightly oil them, and roast at a high temperature. Don’t overcrowd.
Q5: Is this recipe kid-friendly?
Very much so. The cheese and crispy texture make broccoli more appealing to children who might otherwise resist it.
Q6: How long does it take from start to finish?
From prep through roasting and melting cheese, you’re looking at roughly 25-30 minutes, depending on your oven and how quickly you work.
Recipe Card

Cheesy Smashed Broccoli
Ingredients
• 1½ pounds fresh broccoli florets (about 4–5 cups)
• 2 tablespoons olive oil (or melted butter)
• ½ teaspoon garlic powder
• ½ teaspoon salt (adjust to taste)
• ¼ teaspoon black pepper
• 1 cup shredded cheddar cheese (or a mix of cheddar/mozzarella/parmesan)
• Optional toppings: ¼ tsp chili flakes, 1 tsp lemon zest, and 2 tbsp crunchy breadcrumbs
Instructions
1. Set your oven to 425 °F (220 °C) and cover a baking sheet with parchment paper for easy roasting.
2. Trim and wash the broccoli florets. Bring a pot of salted water to a boil (or steam), then cook the florets until just tender (about 3-4 minutes). Drain thoroughly and pat dry.
3. Arrange the broccoli on the baking sheet. Using the bottom of a glass or a spatula, gently flatten each floret until it spreads slightly.
4. Drizzle the olive oil (or melted butter) evenly over the florets. Add a sprinkle of garlic powder, salt, and pepper on top. Stir gently to spread the seasoning evenly across all the pieces.
5. Roast in the preheated oven for about 15-20 minutes, until the edges start to turn golden and crisp.
6. Remove the baking sheet from the oven. Top the broccoli evenly with shredded cheese. Pop it back in the oven for 3–5 minutes until bubbly and melted. Give it 1–2 minutes under the broiler at the end for a golden crust, watching it closely.
7. After taking it out of the oven, finish with chili flakes, lemon zest, or breadcrumbs. Serve right away to enjoy the crisp texture.
Notes
- Keep an eye on the cooking time while boiling or steaming to achieve broccoli that’s tender with a slight crunch.
- Ensure the baking tray is not overcrowded — each floret needs space to crisp.
- Use parchment paper or a non-stick surface to ease cleanup and prevent sticking.
- Mix cheeses for a more complex flavor (for example, cheddar + mozzarella).
- A final broil helps crisp the cheese topping, but watch it closely so it doesn’t burn.
- A splash of fresh lemon juice before serving adds a bright, fresh flavor.
- Store the leftovers in a tightly sealed container in the fridge for up to 3 days. Re-crisp them in the oven or air fryer rather than microwaving.
Nutrition Facts (Approximate Values)
