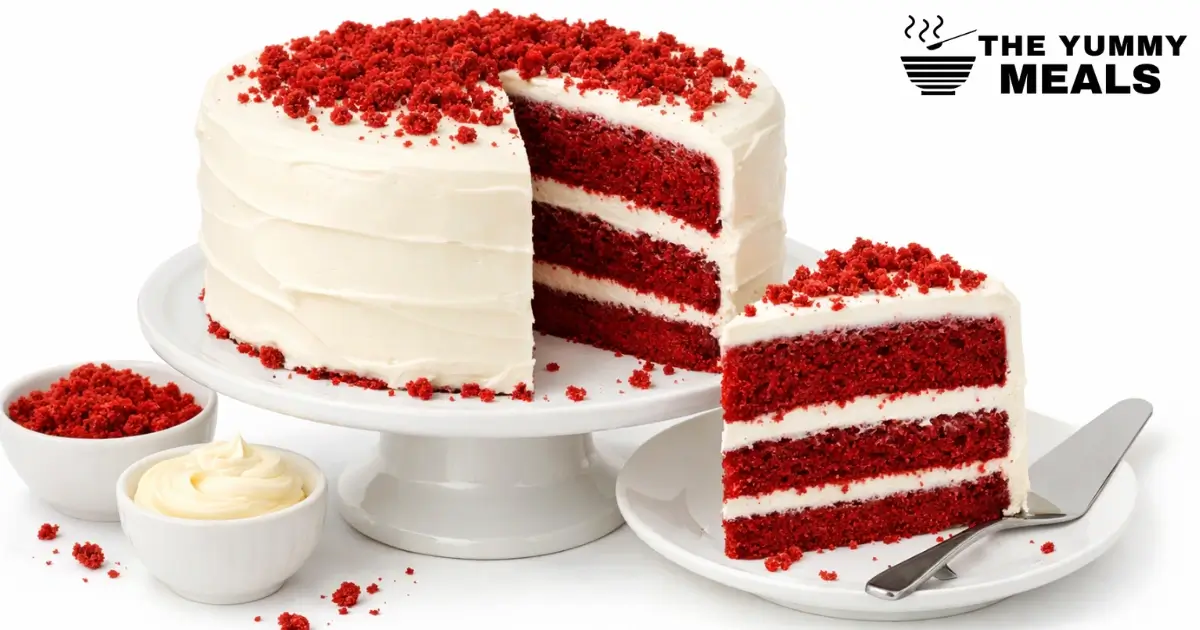
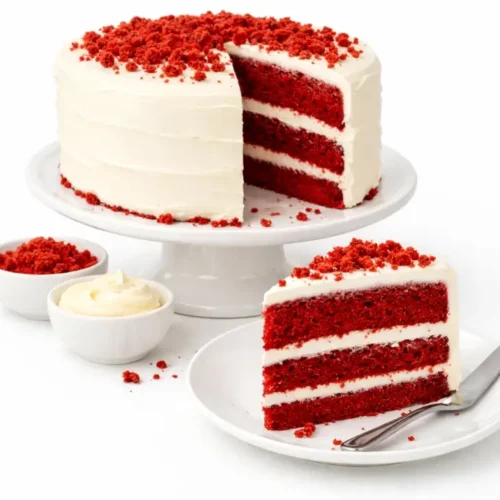
Original Red Velvet Cake Recipe enthusiasts often seek that one version that feels timeless. The kind of cake that is soft, lightly chocolatey, gently tangy, and finished with classic cream cheese frosting. An original red velvet cake is not bright red or overly sweet. It is subtle, balanced, and elegant. This recipe focuses on the true essence of red velvet cake, rather than modern shortcuts or artificial flavors.
Red velvet cake has a rich history rooted in American baking. It became famous for its tender crumb, mild cocoa flavor, and smooth texture. This recipe respects those traditions while using clear, step-by-step instructions that anyone can follow. It is perfect for beginners who want confidence and for home bakers who want consistent results every time, making this original red velvet cake recipe a reliable favorite for any occasion.
Table of Contents
What Is an Original Red Velvet Cake?
An original red velvet cake recipe is known for its soft, fine crumb and slightly tangy taste. It uses a small amount of cocoa powder, not enough to make it a chocolate cake. The texture is moist but light, with a smooth mouthfeel that feels almost silky.
Unlike modern versions, the Original Red Velvet Cake Recipe does not rely on heavy cocoa or excessive food coloring. Traditionally, the red hue came from a natural reaction between cocoa, vinegar, and buttermilk. The color was subtle and deep, not bright or neon.
The flavor of an Original Red Velvet Cake Recipe is balanced. It has gentle cocoa notes, mild sweetness, and a slight tang from butter-milk and vinegar. This balance is what makes red velvet unique and different from plain vanilla or chocolate cakes.
Cocoa and buttermilk matter because they define the cake’s identity. Cocoa adds depth without bitterness, while buttermilk creates tenderness and softness. Together, they give the Original Red Velvet Cake Recipe its signature taste and texture.
Why You’ll Love This Original Red Velvet Cake Recipe
- Soft, Moist, and Velvety Texture: First, the Original Red Velvet Cake Recipe offers a soft, moist texture that feels light in every bite. The crumb is tender and delicate, making the cake melt in your mouth.
- Perfect Balance of Cocoa and Tang: At the center of this Original Red Velvet Cake Recipe is the perfect blend of mild cocoa and gentle tang. Neither flavor overpowers the other, creating a well-rounded and classic taste.
- Rich Color Without Overpowering Sweetness: The cake has a beautiful red color that looks stunning without tasting overly sweet. The flavor stays balanced, allowing the cocoa notes to shine naturally.
- Reliable Results Every Time: This recipe has been thoroughly tested to ensure reliable and consistent results every time. When you follow the steps, you can trust the cake to bake evenly and turn out perfect.
- Easy-to-Follow Method: The steps are simple and clear, making the recipe suitable for both beginners and experienced bakers. You can make it without using special tools or techniques.
- Great for Any Occasion: This cake works well for birthdays, holidays, and special celebrations. Its classic flavor and attractive look make it a crowd favorite.
- Customizable to Your Taste: This flexibility makes the recipe even more enjoyable to use. Choose from various frostings or fillings to match your personal taste.
More Desserts Recipes
- Best Chocolate Cupcakes
- Healthy Apple Crisp Recipe
- Cinnamon Roll Cake
- Banana Coconut Muffins
- Easy Vegan Chocolate Chip Cookies
- Cranberry Orange Muffins
- Pumpkin Roll Recipe
- Healthy Pumpkin Pie
- Greek Butter Cookies Koulourakia
- Chocolate Peanut Butter Crispy Bars
- Simple Blueberry Cake
- Cinnamon Apple Muffins
- Ruffled Milk Pie With Raspberries
- Pumpkin Cheesecake Recipe
Recipe Ingredients
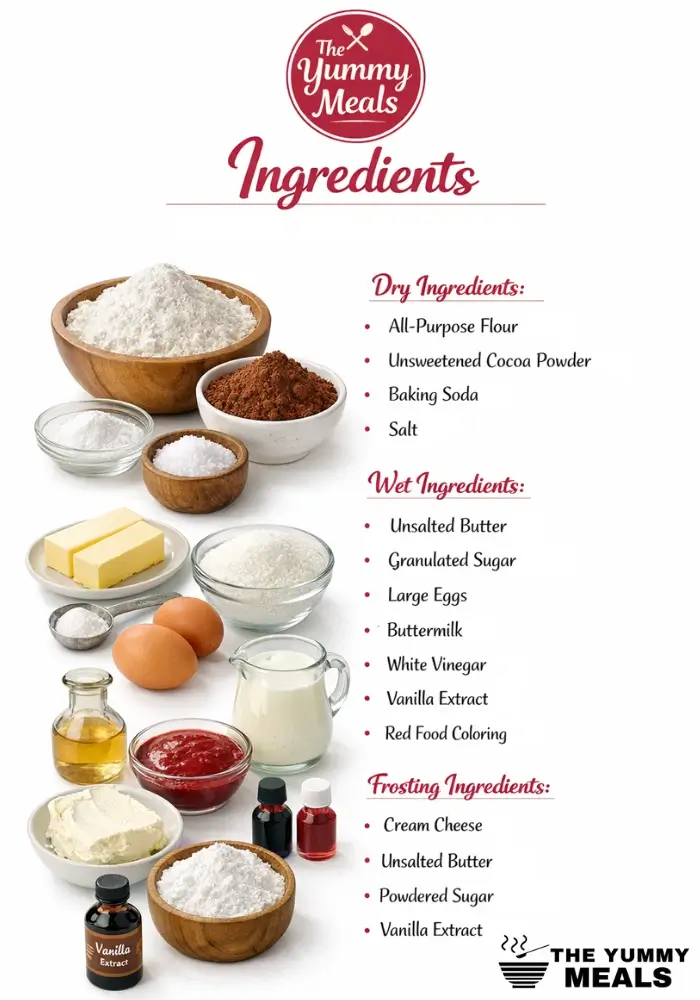
For the Cake Batter
- All-purpose flour: Adds structure without sacrificing softness or tenderness.
- Unsweetened cocoa powder: Used lightly to add a gentle chocolate note without making it bitter.
- Baking soda and salt: Help the cake rise and enhance overall flavor.
- Unsalted butter or oil: Butter adds flavor, while oil increases moisture. Either works well.
- Granulated sugar: Enhances sweetness while creating a light and tender crumb.
- Eggs: Bind the ingredients and add richness.
- Buttermilk: Adds moisture and a slight tang while keeping the cake tender.
- White vinegar: Reacts with cocoa and baking soda to support rising and even flavor.
- Vanilla extract: Enhances the overall taste.
- Red food coloring: Used traditionally to achieve the classic red hue.
For the Classic Cream Cheese Frosting
- Cream cheese: Creates a smooth, tangy base.
- Unsalted butter: Adds richness and structure.
- Powdered sugar: Sweetens and thickens the frosting.
- Vanilla extract: Balances the tang with gentle sweetness.
Kitchen Tools You’ll Need
- Mixing bowls: Separating wet and dry ingredients helps everything combine evenly.
- Measuring cups and spoons: Using exact amounts ensures a balanced taste and proper texture.
- Hand mixer or stand mixer: Makes creaming and frosting easier and smoother.
- Cake pans: Using round pans is ideal for creating layered cakes.
- Cooling rack: Ensures the cakes cool evenly without trapping excess moisture.
- Spatula: Useful for folding batter and spreading frosting smoothly.
How to Make Original Red Velvet Cake Recipe
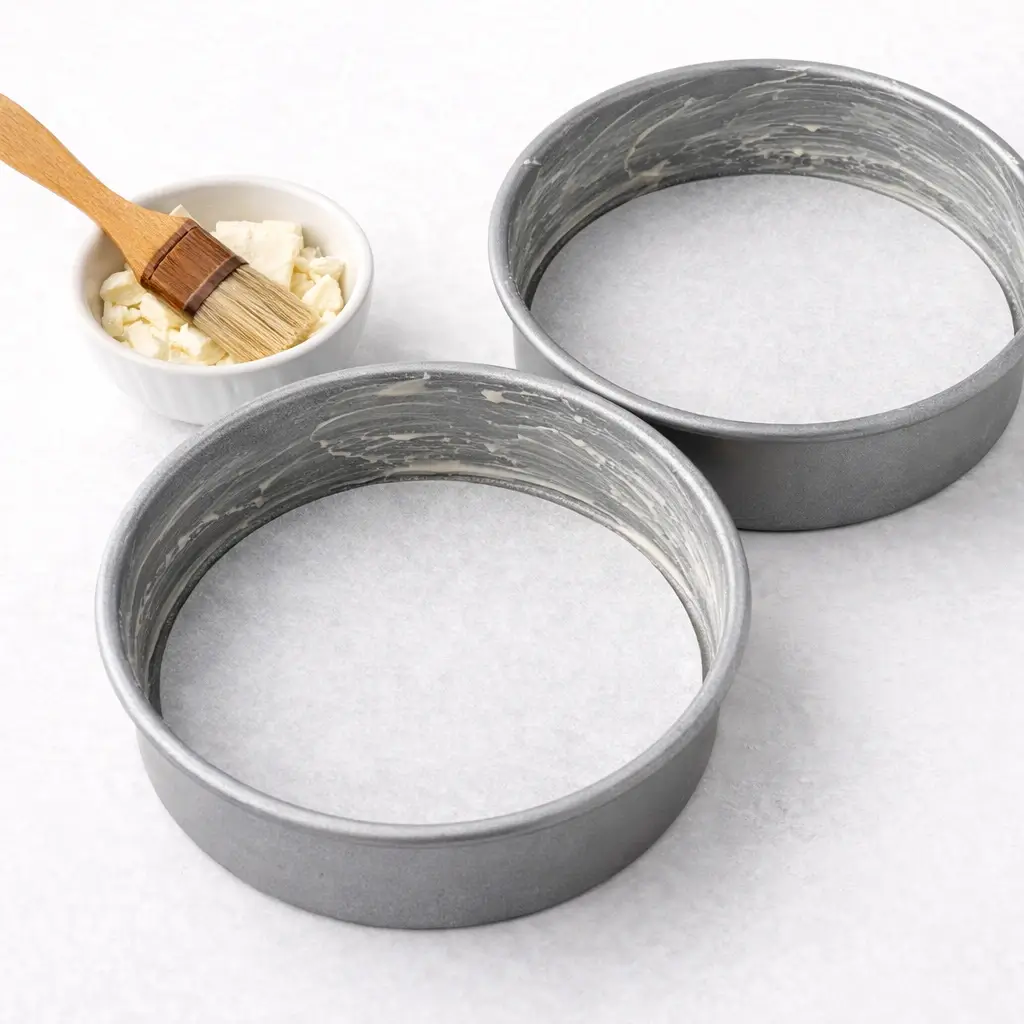
Prepare the Cake Pans
- Prepare the pans by greasing them and lining the bases with parchment. This helps stop sticking and allows the cake to release cleanly.
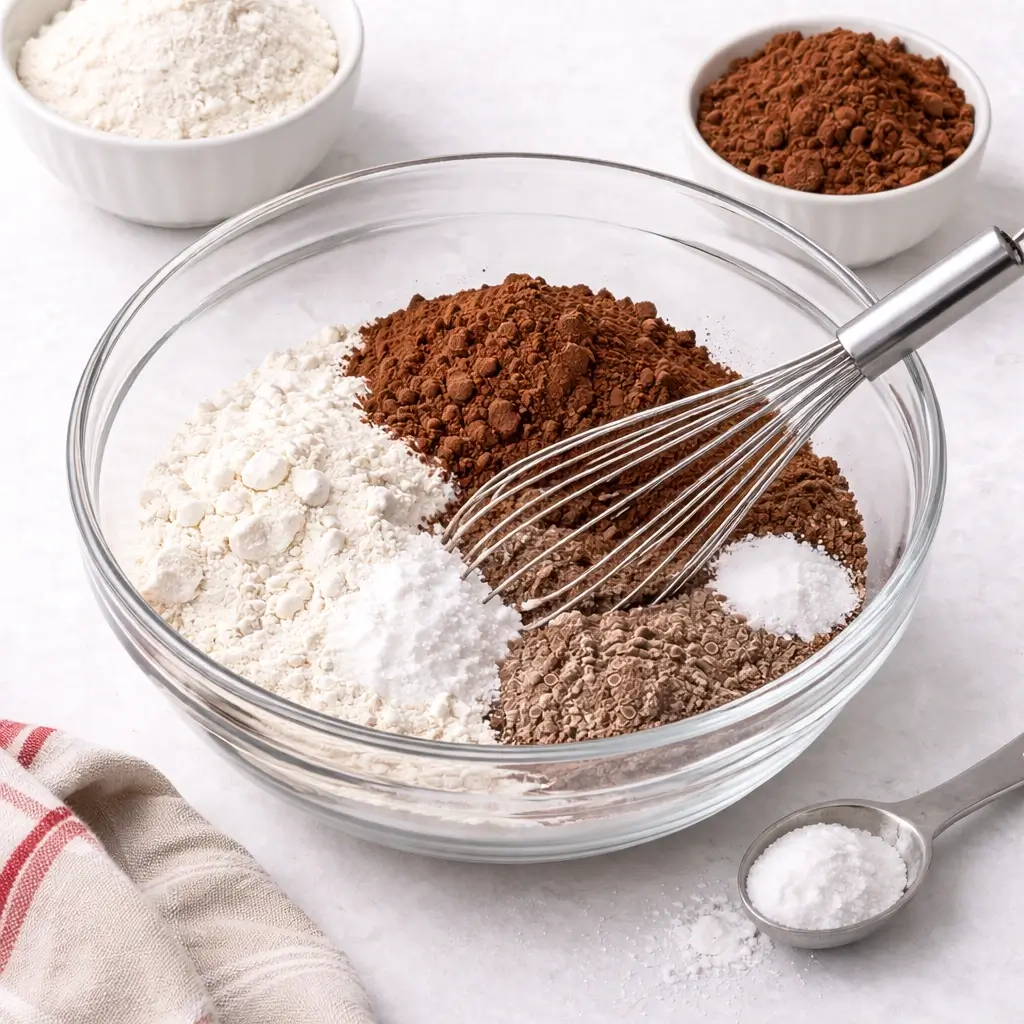
Mix the Dry Ingredients
- Combine flour, cocoa powder, salt, and baking soda. Use a light hand with cocoa to keep the flavor authentic.
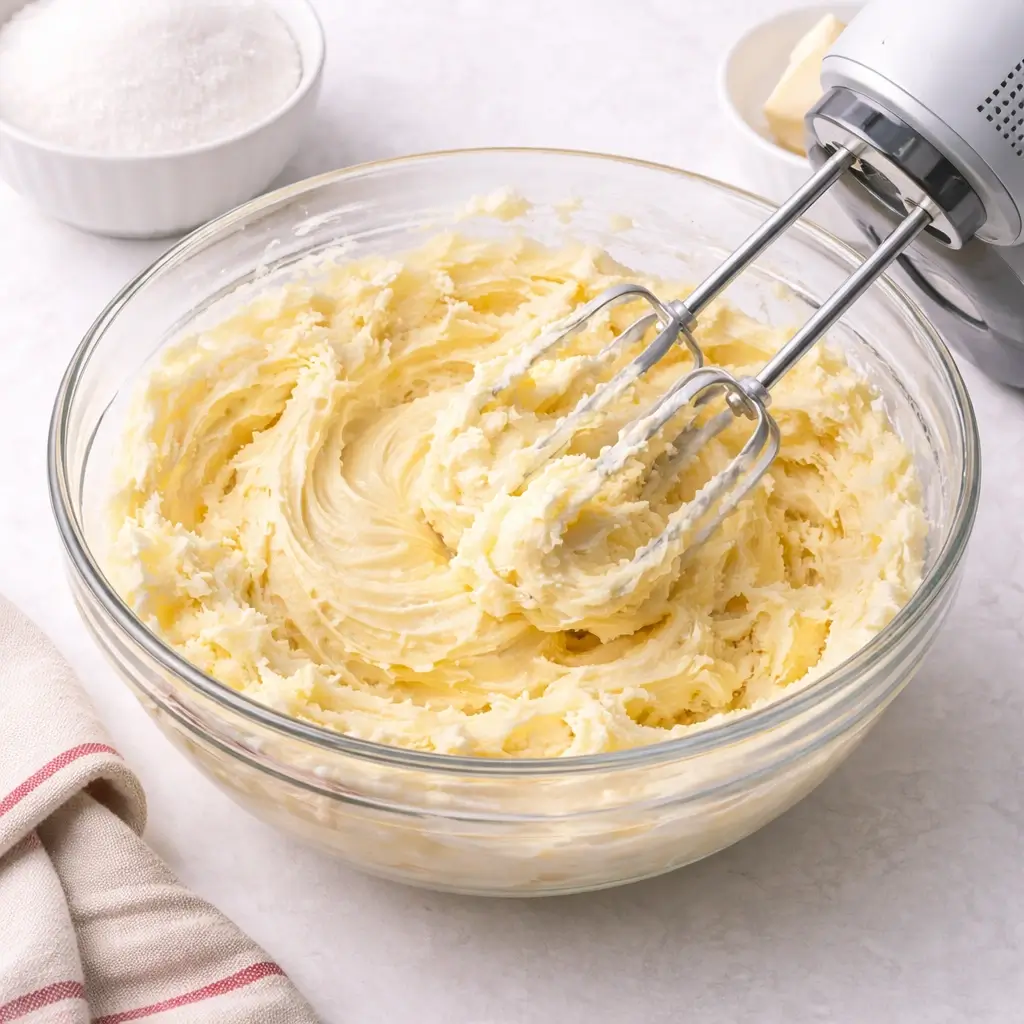
Cream Butter and Sugar
- Beat until light and fluffy. This method builds air and gives the cake a softer crumb.
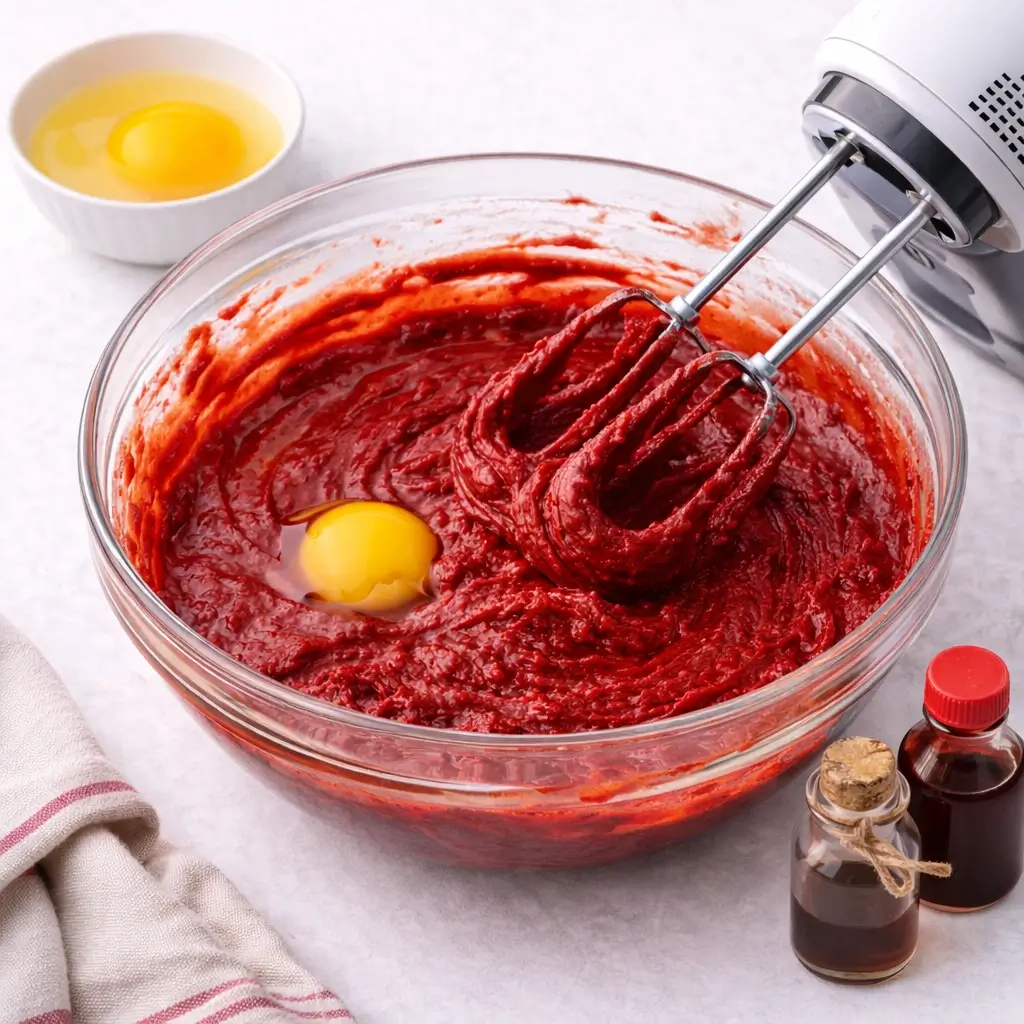
Add Eggs and Flavorings
- Add each egg separately and stir until fully combined. Then blend in vanilla and food coloring for an even color.
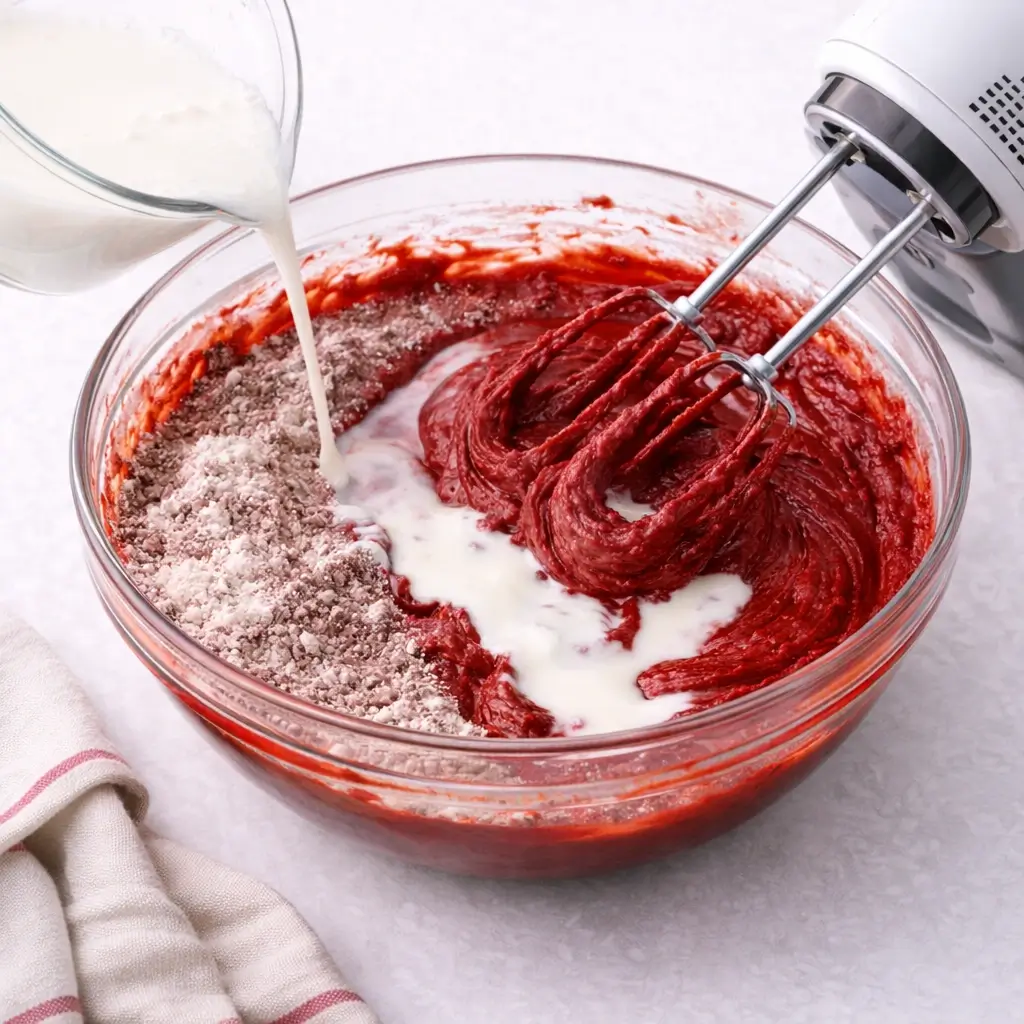
Combine Wet and Dry Ingredients
- Add the dry ingredients and buttermilk in alternating steps. This ensures the batter stays smooth without overmixing.
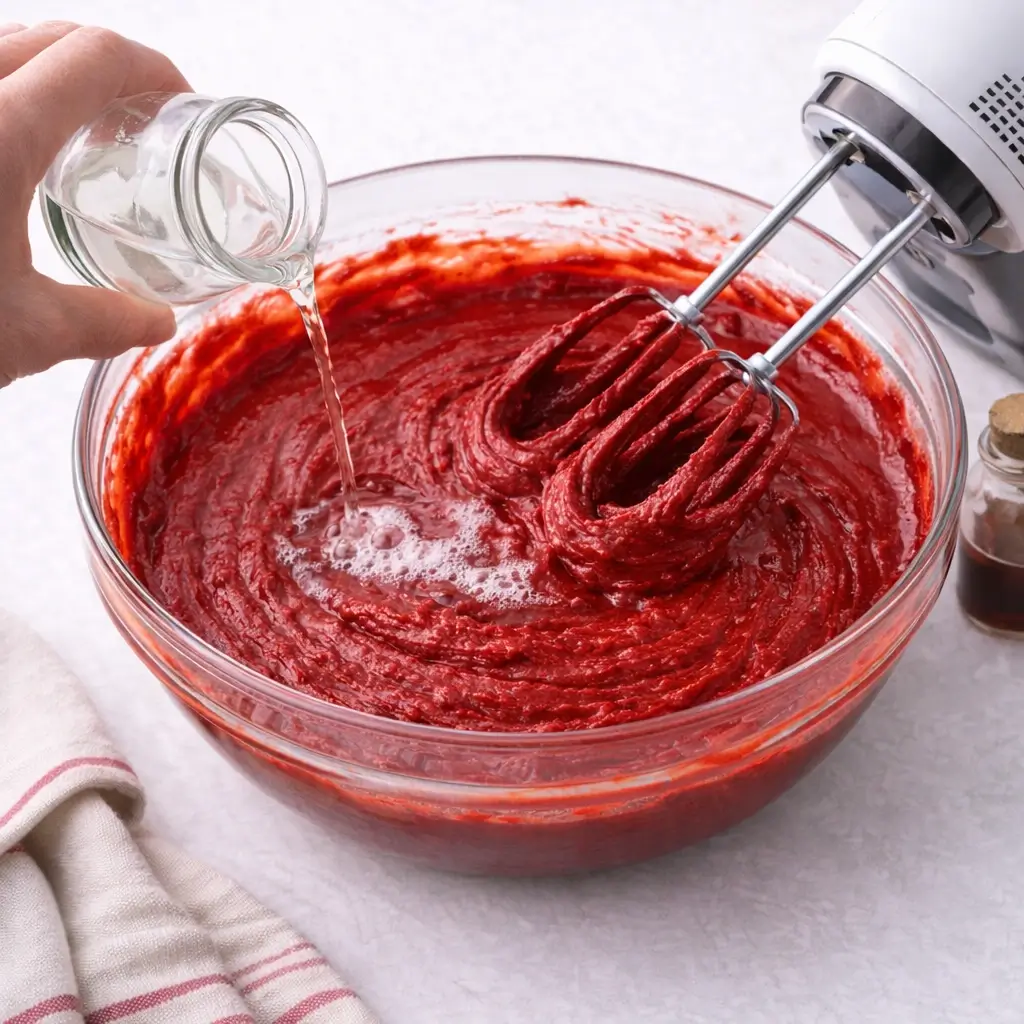
Activate the Baking Soda
- Mix vinegar in at the end. It reacts immediately, so bake without delay.
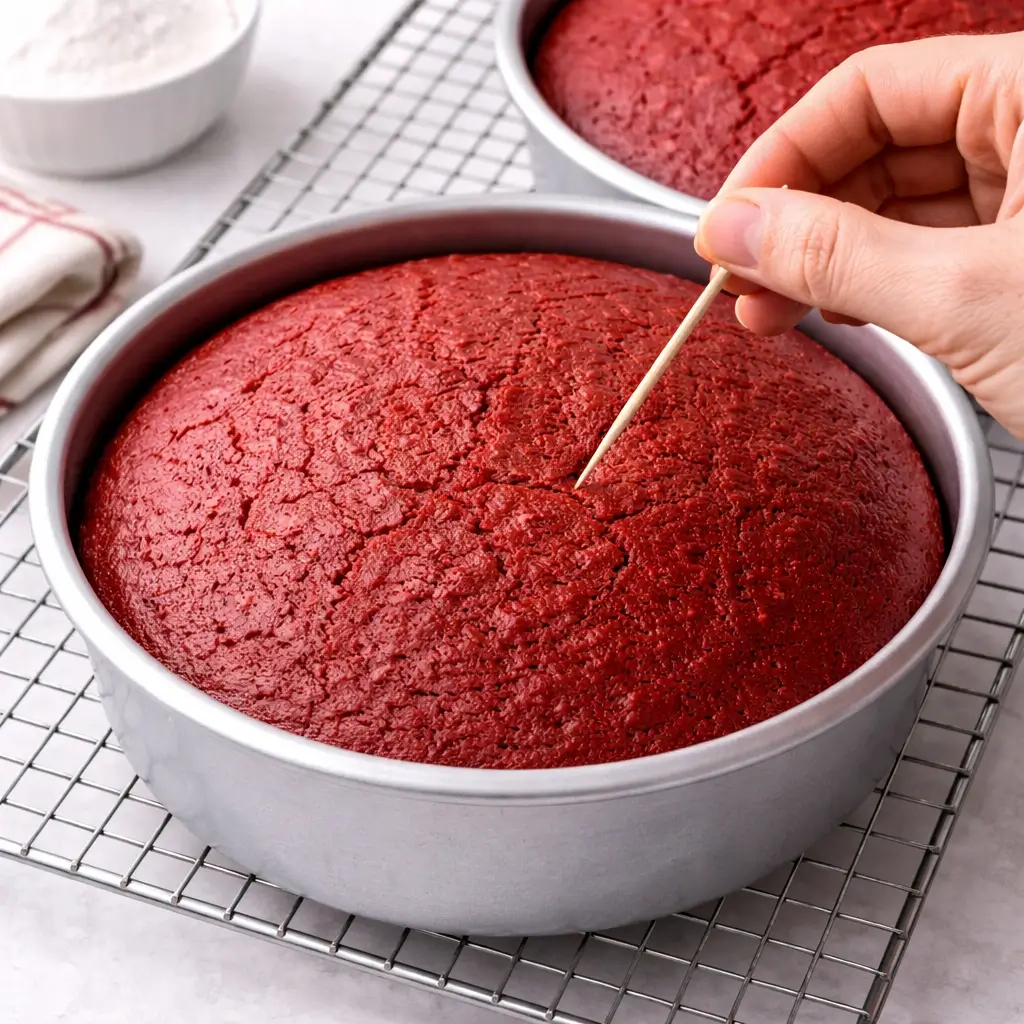
Bake the Cake Layers
- Bake until a toothpick inserted comes out clean. Be careful not to overbake, or the cake will lose moisture.
How to Make Classic Cream Cheese Frosting
- Achieving Smooth and Fluffy Frosting: Start with cream cheese and butter at room temperature. This helps them blend easily and creates a light, creamy texture. Beat gently at first, then increase speed until the frosting looks smooth and fluffy.
- Preventing Lumps and Over-Mixing: Always pass the powdered sugar through a sieve first. Keep the mixer on low and stop as soon as the ingredients are blended. Mixing too much can cause the frosting to become runny rather than creamy.
- Frosting Consistency Tips: If the frosting feels too thick, add a small splash of cream or milk. If it is too soft, chill it for a few minutes or add a little more powdered sugar. The frosting needs to be spreadable yet stable in shape.
Assembling and Frosting the Cake
- Layering the Cake Evenly: Start by slicing the tops of the cake layers to create a flat surface. This helps the layers stack neatly and stay stable. Even layers also make the cake look clean and professional.
- Crumb-Coat Method: Spread a thin layer of frosting over the entire cake to trap loose crumbs. This first coat does not need to look perfect. Chill the cake briefly so the crumbs set before adding the final layer.
- Final Frosting Techniques for a Clean Finish: Apply the remaining frosting evenly using an offset spatula. Smooth the sides and top with gentle strokes for a polished look. Clean the spatula frequently for a polished and smooth look.
Expert Tips for the best Original Red Velvet Cake Recipe
The success of the Original Red Velvet Cake Recipe depends on small but meaningful details. When each step is done with care, the cake turns out soft, flavorful, and perfectly balanced every time.
- Avoiding Dry or Dense Cake: Measure all ingredients accurately and avoid over-mixing the batter. Excess mixing creates gluten, which can make the cake feel heavy. Stop baking once the toothpick comes out with slightly moist crumbs.
- Rich Red Color Without Harsh Flavor: Start with a quality cocoa powder and add the coloring bit by bit. Excess cocoa may create a bitter flavor and reduce color brightness. The right balance keeps the cake vibrant and smooth in flavor.
- Baking and Frosting Timing Tips: Let the cake layers cool completely before frosting. Cake layers that are still warm can cause the frosting to melt and slide. Patience here gives a clean and stable finish.
- Use Room-Temperature Ingredients: For the Original Red Velvet Cake Recipe, always use butter, eggs, and cream cheese at room temperature. It helps the ingredients combine smoothly and evenly. It also helps create a softer, lighter texture in the finished cake.
- Don’t Skip the Buttermilk: Buttermilk adds moisture and a gentle tang. It keeps the crumb tender and improves overall flavor. Substituting it can change the cake’s classic taste.
- Chill Before Final Frosting: After applying the crumb coat, chill the cake briefly. This locks in crumbs and firms the surface. It allows the last layer of frosting to spread smoothly with less effort.
- Store the Cake Properly: Cover the cake and refrigerate it once frosted. Allow it to reach room temperature before serving to enjoy the best texture and flavor. These steps help your Original Red Velvet Cake Recipe stay fresh and delicious.

Original Red Velvet Cake Recipe Variations
The Original Red Velvet Cake Recipe is easy to adapt and works beautifully in different forms. A few simple changes can bring fresh variations without losing the beloved taste.
- Red Velvet Cupcakes: Turn the batter into cupcakes for easy serving and portion control. They bake faster and are perfect for parties or gatherings. The soft texture stays just as moist.
- Sheet Cake Version: Bake the cake in a single large pan for a simple, no-fuss option. This option works well when serving a large group. It keeps the same flavor with less decorating effort.
- Natural Food Coloring Option: Use beet powder or beet juice instead of artificial coloring. This adds a gentle red hue and a natural touch. The taste stays balanced and smooth.
- Chocolate-Forward Red Velvet Variation: Increase the cocoa slightly for a deeper chocolate flavor. This version tastes richer without losing the red velvet identity. It pairs well with cream cheese frosting.
- Mini Layer Cake: Bake the batter in smaller pans to create a mini cake. This works well for small gatherings or as a thoughtful gift. It looks elegant and feels special.
- Gluten-Free Adaptation: Swap regular flour with a good-quality gluten-free blend. The cake still stays moist and tender. It’s a great option for dietary needs.
- Lighter Frosting Style: Use a whipped cream cheese frosting for a softer finish. It feels lighter on the palate and balances the cake well. This works beautifully with the Original Red Velvet Cake Recipe.
No matter which version you choose, these ideas help you enjoy the Original Red Velvet Cake Recipe in fresh and creative ways.
Serving Suggestions for Original Red Velvet Cake Recipe
- The Best occasions to serve red velvet cake: Red velvet cake is perfect for birthdays, holidays, and special celebrations. Its rich color and classic flavor make it a favorite for festive tables. It also works well for casual get-togethers when you want something special.
- Pairing ideas (drinks and desserts): Serve red velvet cake with coffee, hot chocolate, or a glass of cold milk. For dessert pairings, fresh berries or a small scoop of vanilla ice cream balance the sweetness. These combinations enhance the cake without overpowering it.
- Presentation tips: Slice the cake cleanly and wipe the knife between cuts for neat edges. Add a light frosting swirl or a sprinkle of cake crumbs on top for decoration. Simple garnishes keep the cake looking elegant and inviting.
Storage and Make-Ahead Instructions
- Proper Storage for Frosted and Unfrosted Cake: Keep unfrosted cake layers wrapped securely at room temperature for short-term storage. Cover the frosted cake properly and store it in the fridge to keep the frosting fresh. Always protect the cake from the air to prevent drying.
- Refrigerator and freezer guidelines: Refrigerate the cake if storing for more than one day. For longer storage, freeze wrapped cake layers or slices in an airtight container. For the best texture, allow it to defrost slowly in the refrigerator.
- Shelf life tips: The cake can stay fresh at room temperature for one to two days if it is unfrosted. In the refrigerator, it lasts up to five days when covered properly. Freezing extends freshness for several weeks without losing flavor.

Frequently Asked Questions
Why is vinegar used in red velvet cake?
Vinegar activates the baking soda, allowing the cake to rise well. It also balances the flavors and enhances the soft texture. You will not taste it in the final cake.
Is red velvet just chocolate cake?
No, it is different from regular chocolate cake. Red velvet has only a light cocoa flavor and a slight tang. This gives it a unique and balanced taste.
Can I skip food coloring?
Yes, it is optional and can be omitted if you want. The cake will still taste the same, but will have a natural brown shade. You can also use natural coloring options.
Why use buttermilk?
Buttermilk adds moisture and a gentle tang to the batter. It keeps the cake soft and tender. It also helps improve the overall flavor.
How do I prevent dryness?
Measure ingredients carefully and avoid over-baking. Do not over-mix the batter. These steps help keep the cake moist and light.
Can I make it ahead?
Yes, the cake can be baked in advance. Store the layers properly and frost them later. This actually helps the flavors settle nicely.
What frosting works best?
Classic cream cheese frosting pairs best with red velvet cake. Its tangy and creamy taste balances the cake’s sweetness. It also gives a smooth, rich finish.
Recipe Card
Original Red Velvet Cake Recipe
Ingredients
• All-purpose flour – 2½ cups
• Unsweetened cocoa powder – 2 tbsp
• Baking soda – 1 tsp
• Salt – ½ tsp
• Unsalted butter – ½ cup
• Granulated sugar – 1½ cups
• Eggs – 2
• Buttermilk – 1 cup
• White vinegar – 1 tsp
• Vanilla extract – 1 tsp
• Red food coloring – 1 tbsp
• Cream cheese – 8 oz
• Unsalted butter – ½ cup
• Powdered sugar – 3½ cups
• Vanilla extract – 1 tsp
Instructions
1. Preheat the oven and prepare pans.
2. Mix dry ingredients.
3. Cream butter and sugar.
4. Add eggs, vanilla, and color.
5. Alternate dry mix and buttermilk.
6. Stir in vinegar.
7. Bake and cool.
8. Prepare frosting.
9. Assemble and frost.
Notes
- Use room-temperature ingredients.
- Measure flour correctly.
- Do not overmix.
- Cool cakes completely.
- Chill frosting if needed.
- Adjust color gradually.
- Store properly for freshness.
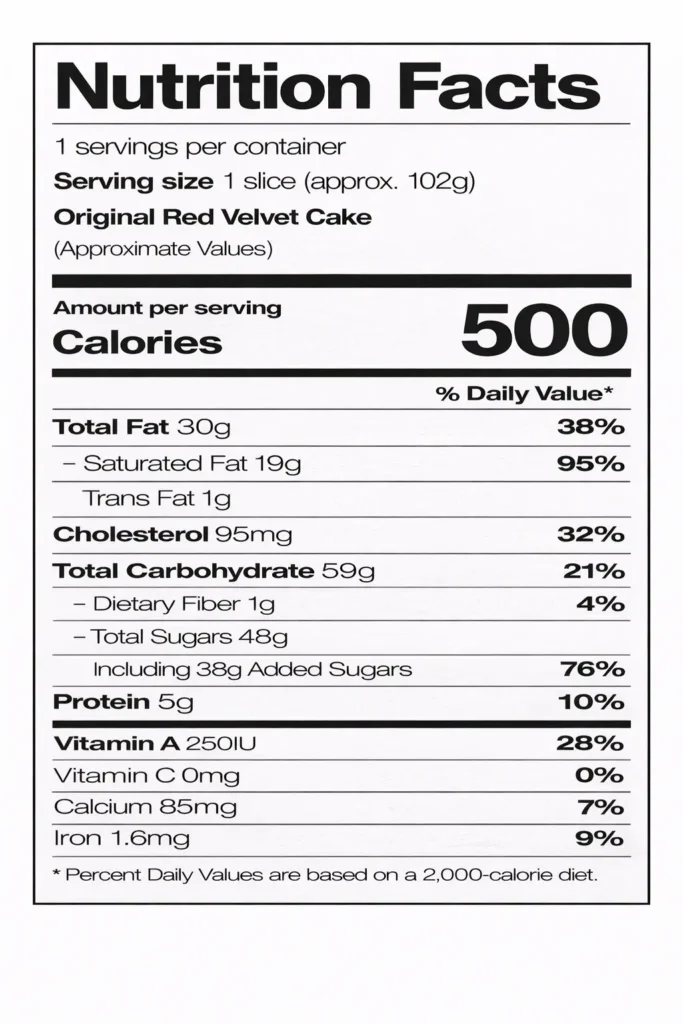
Nutrition Facts (Approximate Values)