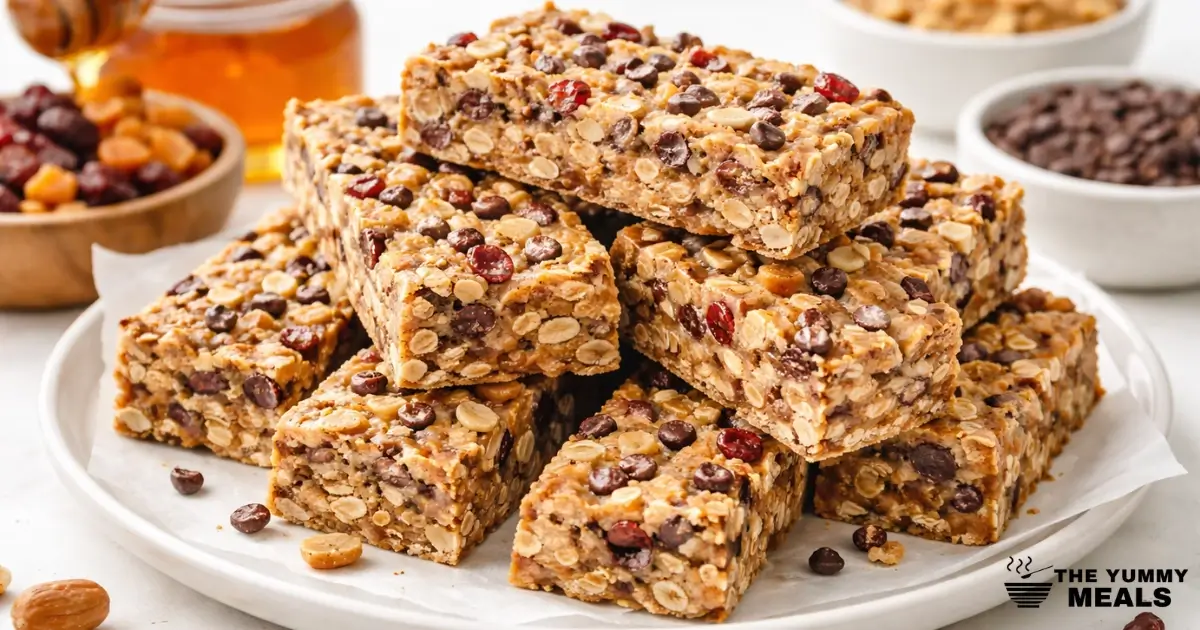
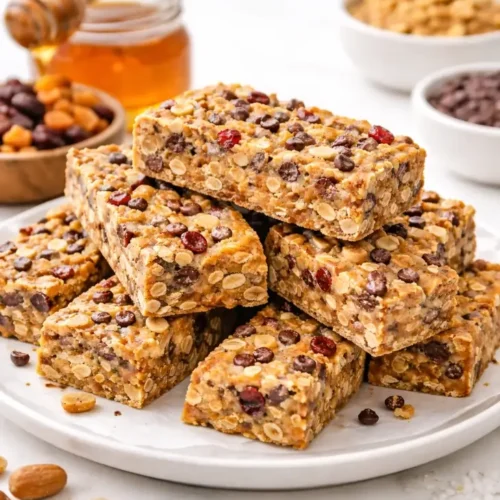
These No-Bake Granola Bars are a simple and delicious snack that anyone can make at home. They do not require baking, which makes them quick and convenient. You only need a few basic ingredients and a refrigerator. They are soft and chewy, making them perfect for breakfast, snacks, or anytime on busy days.
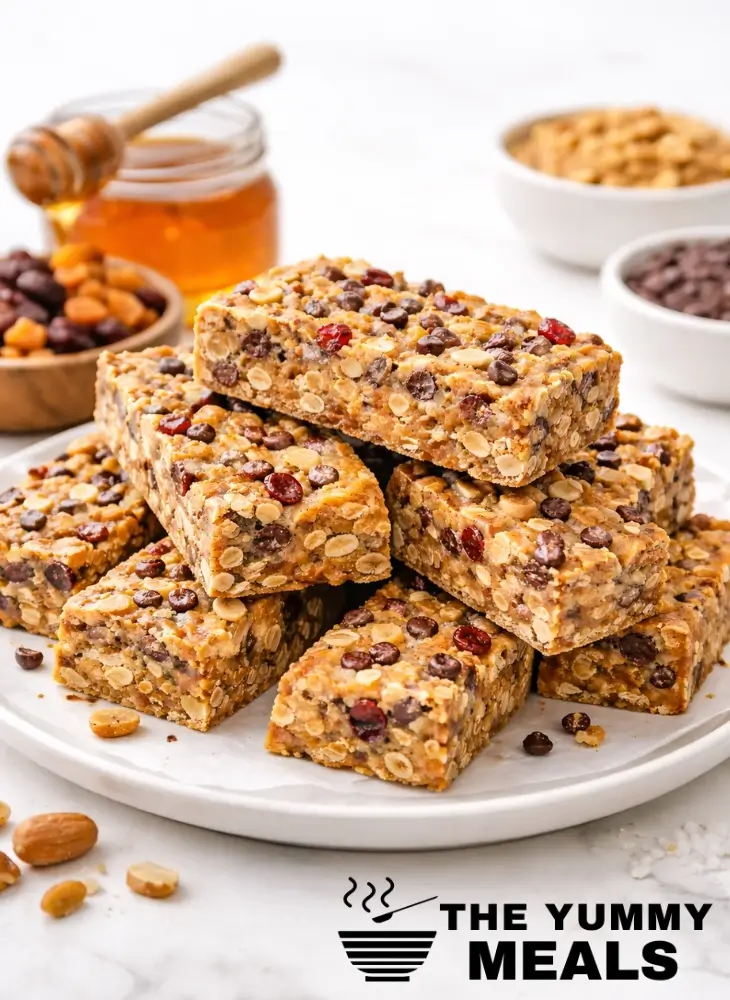
These homemade bars are also easy to customize with your favorite ingredients. You can add nuts, seeds, or chocolate chips for more flavor and texture. They are great for meal prep and stay fresh for days when stored properly. Both kids and adults enjoy them because they taste great and are easy to take anywhere. These No-Bake Granola Bars are loved for their taste and convenience.
Table of Contents
What Are No-Bake Granola Bars?
No-bake granola bars are simple, homemade snack bars that don’t require an oven. They are made by mixing ingredients and letting them set in the refrigerator. These bars are perfect for a quick, easy snack without baking. Many people love this recipe because they save time and effort while still delivering a delicious result.
These bars are commonly made with rolled oats, nut butter, honey or syrup, and small extras like nuts, seeds, or chocolate chips. Keep mixing until the texture turns sticky and is evenly combined. After that, spread it into a pan and chill until it becomes firm. The No-Bake Granola Bars are popular because they select simple ingredients that are easy to find in any kitchen.
No-bake granola bars are also known for their soft, chewy texture and rich flavor. You can easily customize them to match your taste preferences. You can make them healthier or sweeter by changing the ingredients. This makes the No-Bake Granola Bars perfect for both kids and adults.
These bars are great for breakfast, lunchboxes, or quick snacks during busy days. They are convenient, filling, and easy to store. Once you try them, they can become a regular part of your homemade snack routine.
Why You’ll Love This Recipe
- Time-Saving Preparation: No-Bake Granola Bars are perfect when you want a quick snack without spending too much time in the kitchen. You only need to mix the ingredients and chill them until firm. There is no baking, no waiting for the oven, and very little cleanup, which makes the process easy and stress-free.
- Easy to Customize: This recipe allows you to adjust the ingredients based on your taste and preference. You can add nuts, dried fruits, seeds, or chocolate chips to create your favorite flavor. This flexibility makes No-Bake Granola Bars a great option for everyone, whether you prefer healthy or sweet snacks.
- Perfect for Meal Prep: These bars are ideal for preparing in advance and storing for later use. You can make a batch and keep it in the refrigerator for several days. They stay fresh, tasty, and ready whenever you need a quick and convenient snack.
- Kid-Friendly and Budget-Friendly: Kids love the soft texture and delicious taste of these bars. They are also made with simple and affordable ingredients, which helps you save money. You can prepare a large batch at home without spending much.
- Healthy and Wholesome Snack: These bars can be made with nutritious ingredients like oats, nut butter, and natural sweeteners. They supply energy and help you remain full for longer. This makes them a wise choice for people of all ages.
- Easy to Store and Carry: These bars are easy to pack and take anywhere, whether it is school, work, or travel. They do not create a mess and stay firm when chilled properly. You can enjoy No-Bake Granola Bars anytime because they are convenient and reliable.
More Desserts Recipes
- Chocolate Peanut Butter Crispy Bars
- Chocolate Peanut Butter Oat Cookies
- Original Red Velvet Cake Recipe
- Best Chocolate Cupcakes
- Healthy Apple Crisp Recipe
- Cinnamon Roll Cake
- Banana Coconut Muffins
- Easy Vegan Chocolate Chip Cookies
- Cranberry Orange Muffins
- Pumpkin Roll Recipe
- Healthy Pumpkin Pie
- Greek Butter Cookies Koulourakia
- Simple Blueberry Cake
- Cinnamon Apple Muffins
- Ruffled Milk Pie With Raspberries
- Pumpkin Cheesecake Recipe
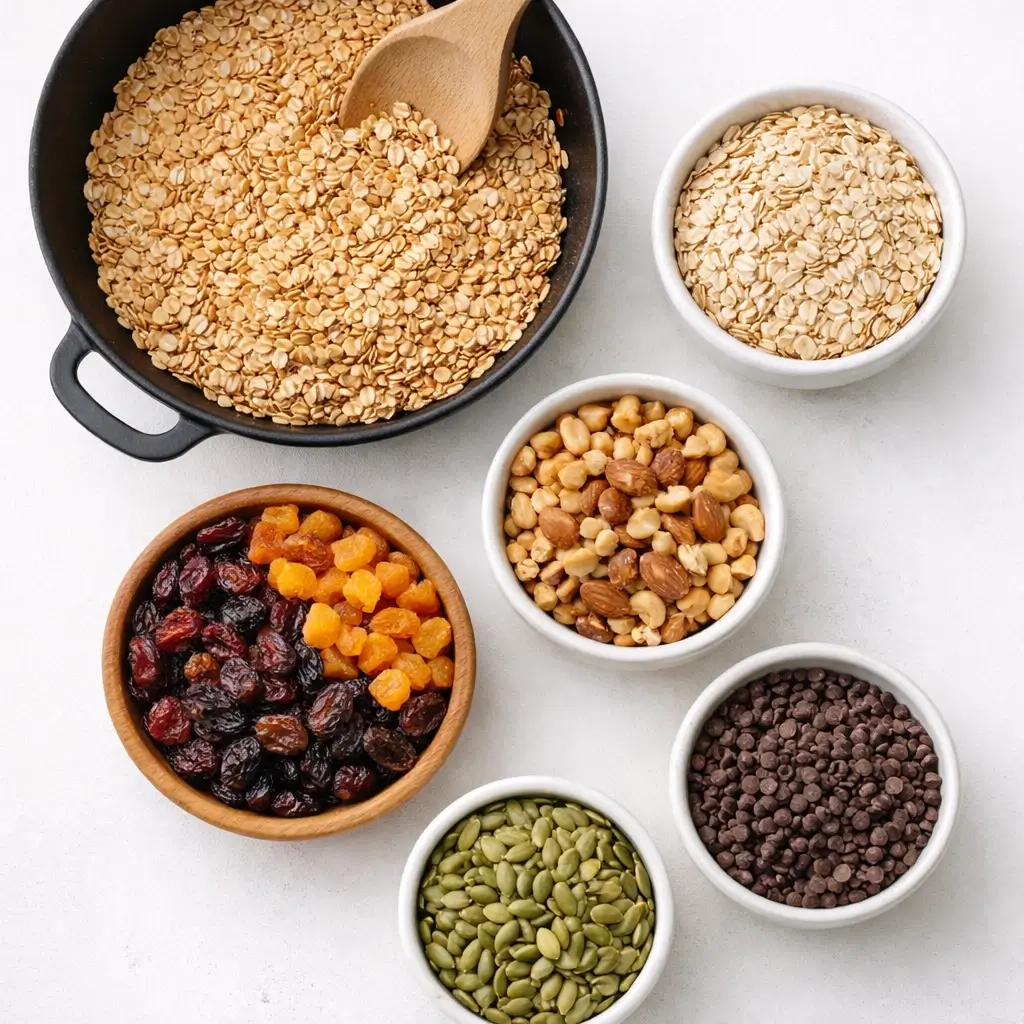
Ingredients You Need
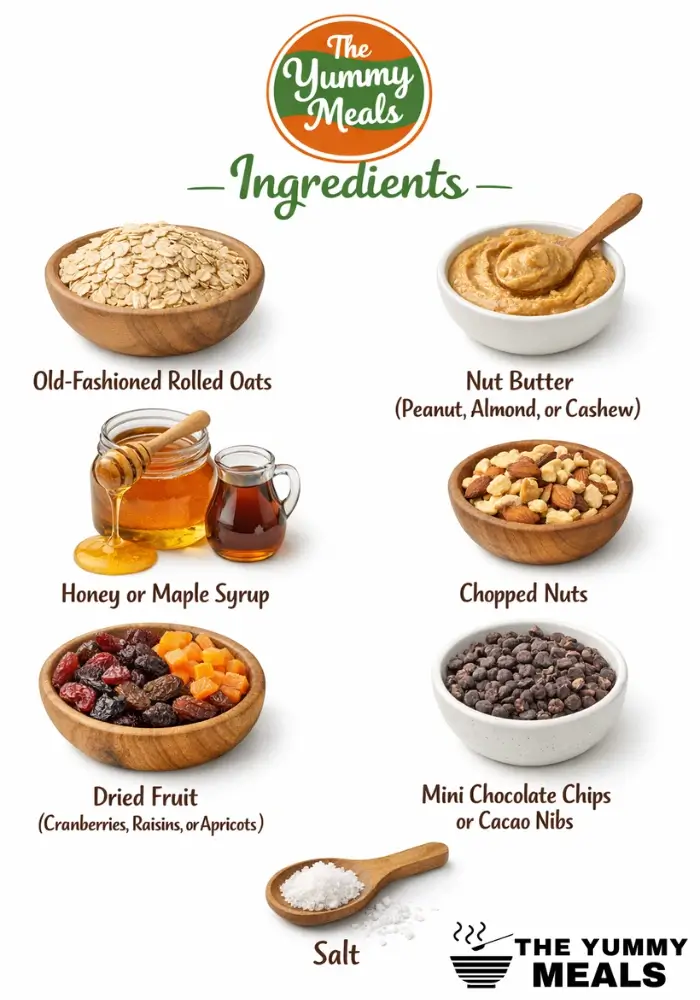
Core Ingredients
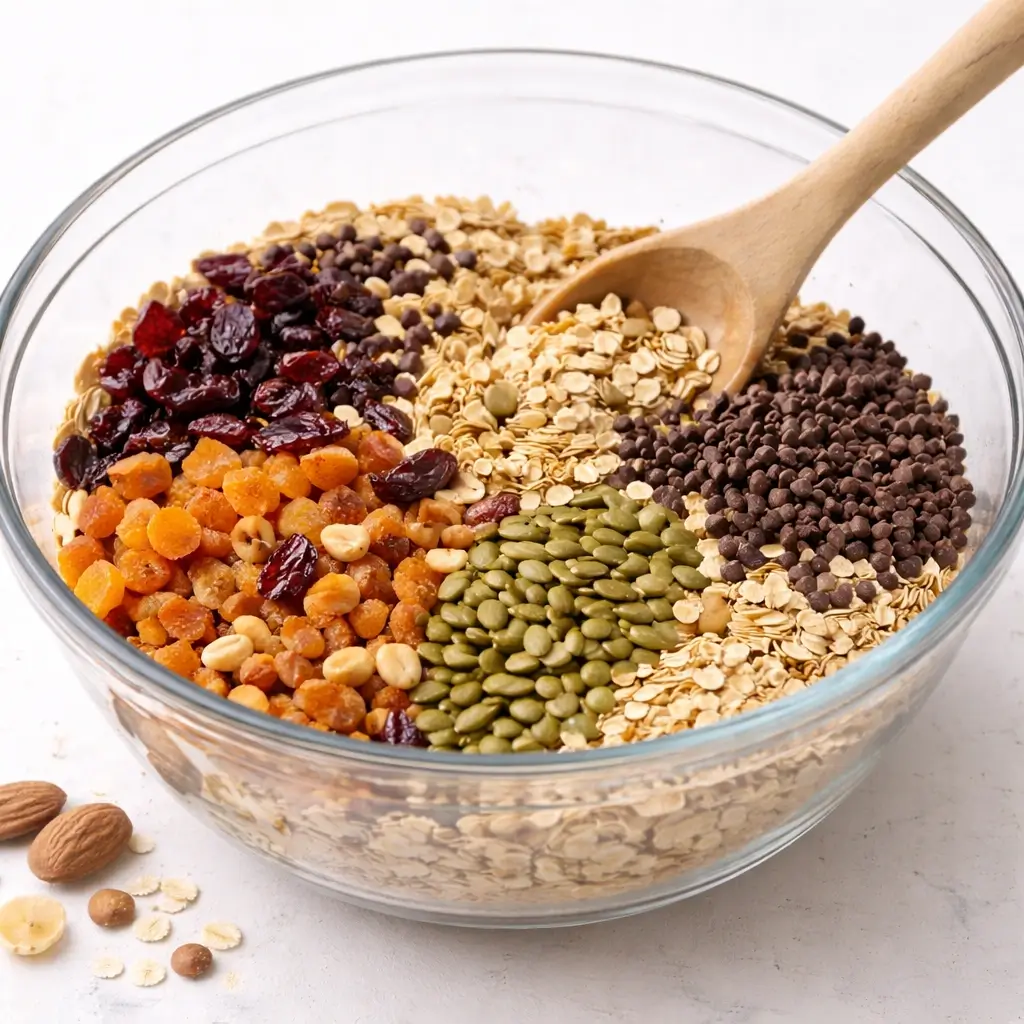
- Rolled oats:- Use old-fashioned oats for the best chewy texture.
- Nut butter:- Peanut butter, almond butter, or cashew butter works well.
- Sweetener: Honey or maple syrup helps bind the bars and adds natural sweetness.
Optional Mix-Ins
- Add chopped nuts such as almonds, walnuts, or pecans for extra crunch.
- Seeds such as chia seeds, flaxseeds, or sunflower seeds for extra nutrition.
- Mini chocolate chips or cacao nibs for a sweet touch.
- Dried fruit such as cranberries, raisins, or chopped apricots has a fruity flavor.
Substitution Suggestions
- For vegan bars, use maple syrup or agave instead of honey.
- For nut-free bars, swap nut butter for sunflower seed butter.
- For gluten-free bars, use certified gluten-free oats.
Directions for No-Bake Granola Bars
Prepare Your Ingredients
- Decide whether you want to toast your oats. Toasting adds a deeper flavor, but you can leave them raw for a softer texture. Gather and measure your dry ingredients (oats, nuts, seeds, or mix-ins).
- Measure your wet ingredients (nut butter and sweetener) so they are ready to combine.
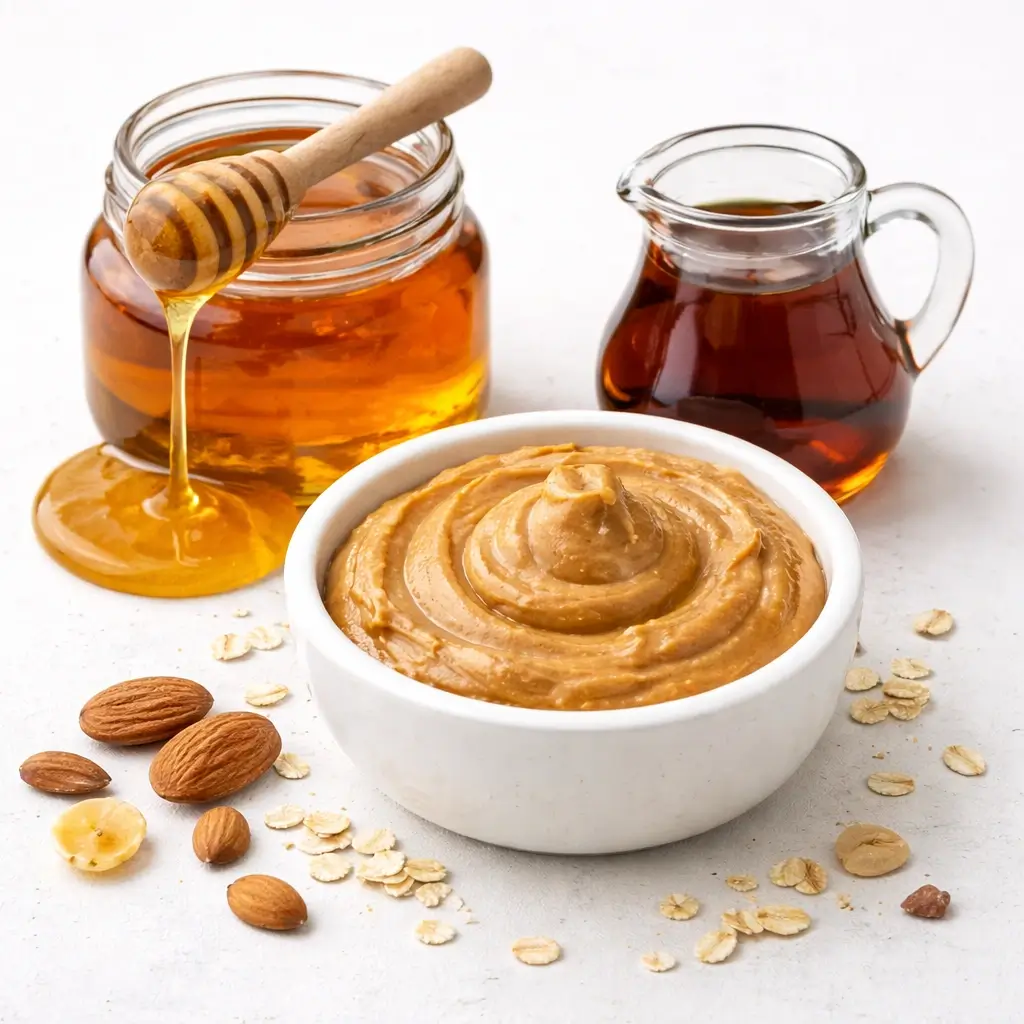
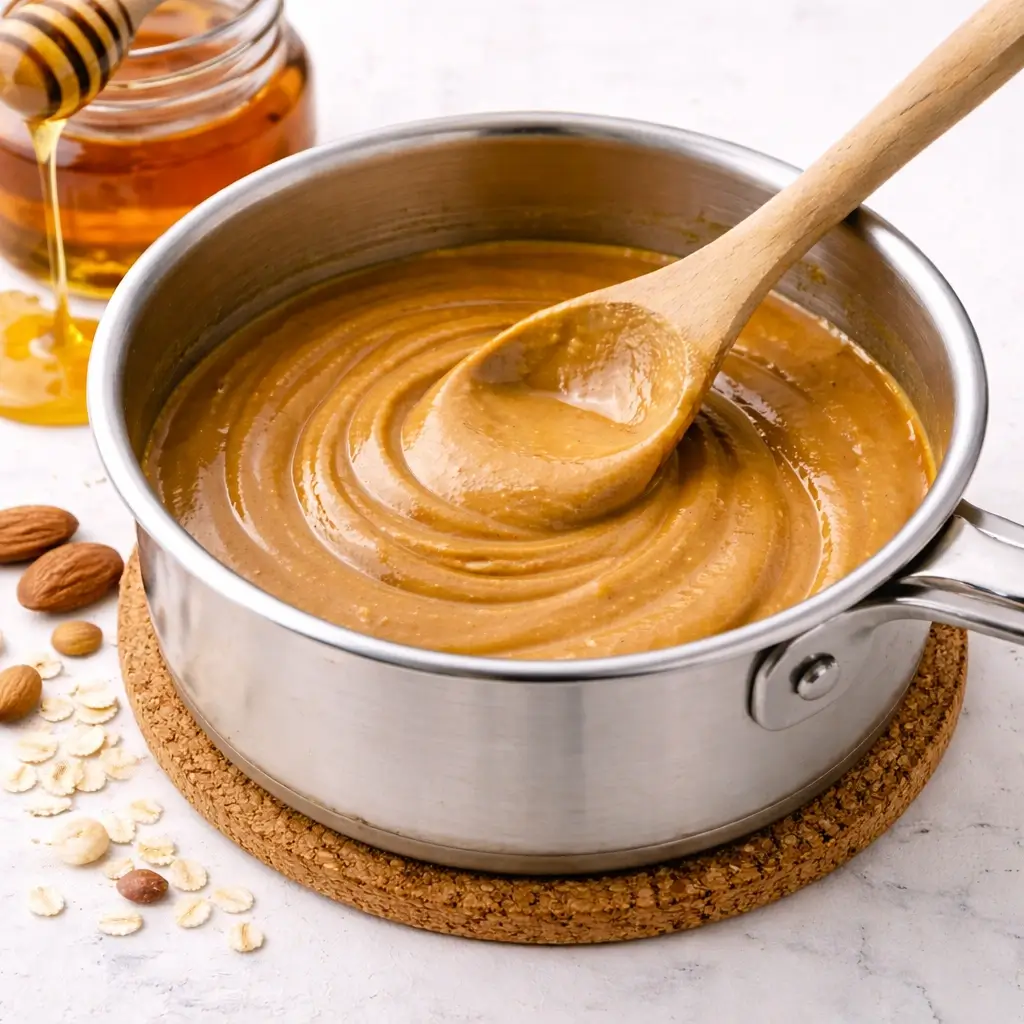
Make the Binding Mixture
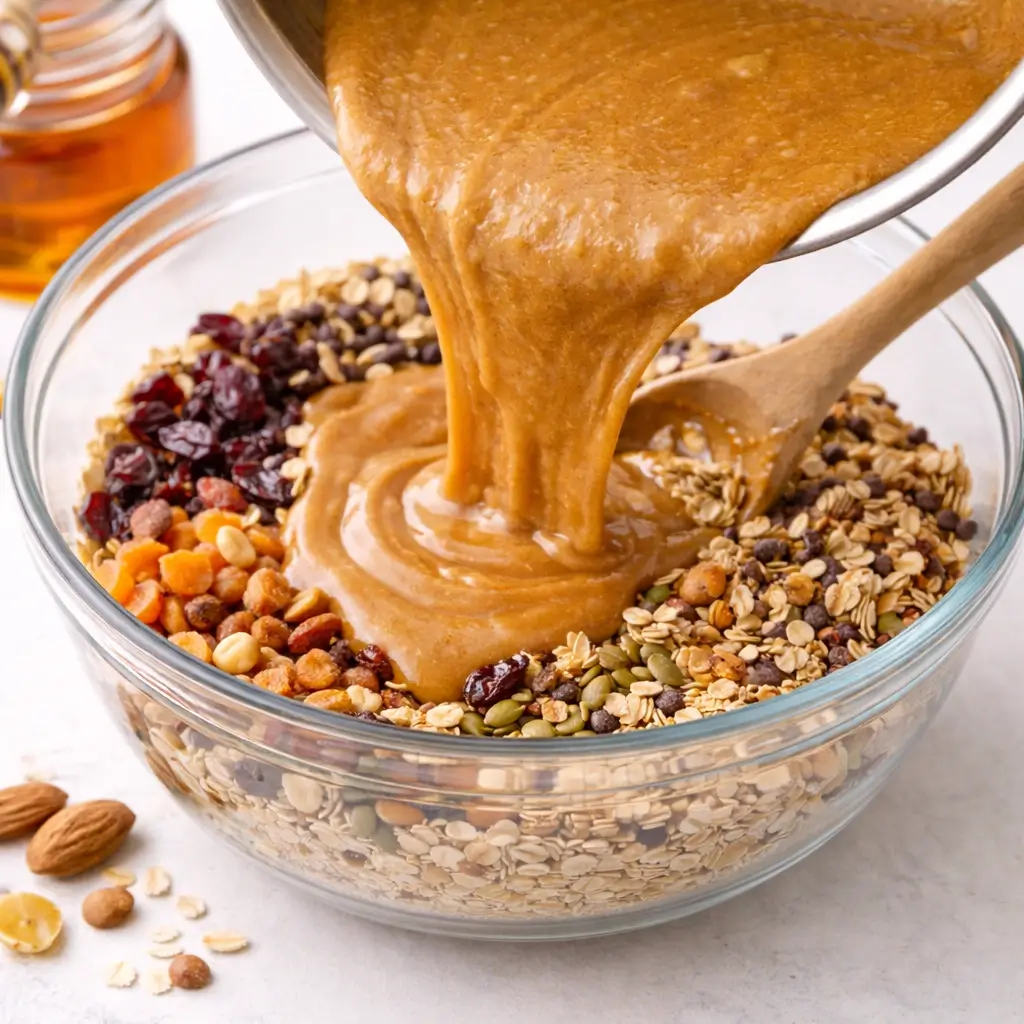
- Place the nut butter and honey (or maple syrup) in a small saucepan. Heat over low or medium heat, stirring until the mixture is smooth and well-blended.
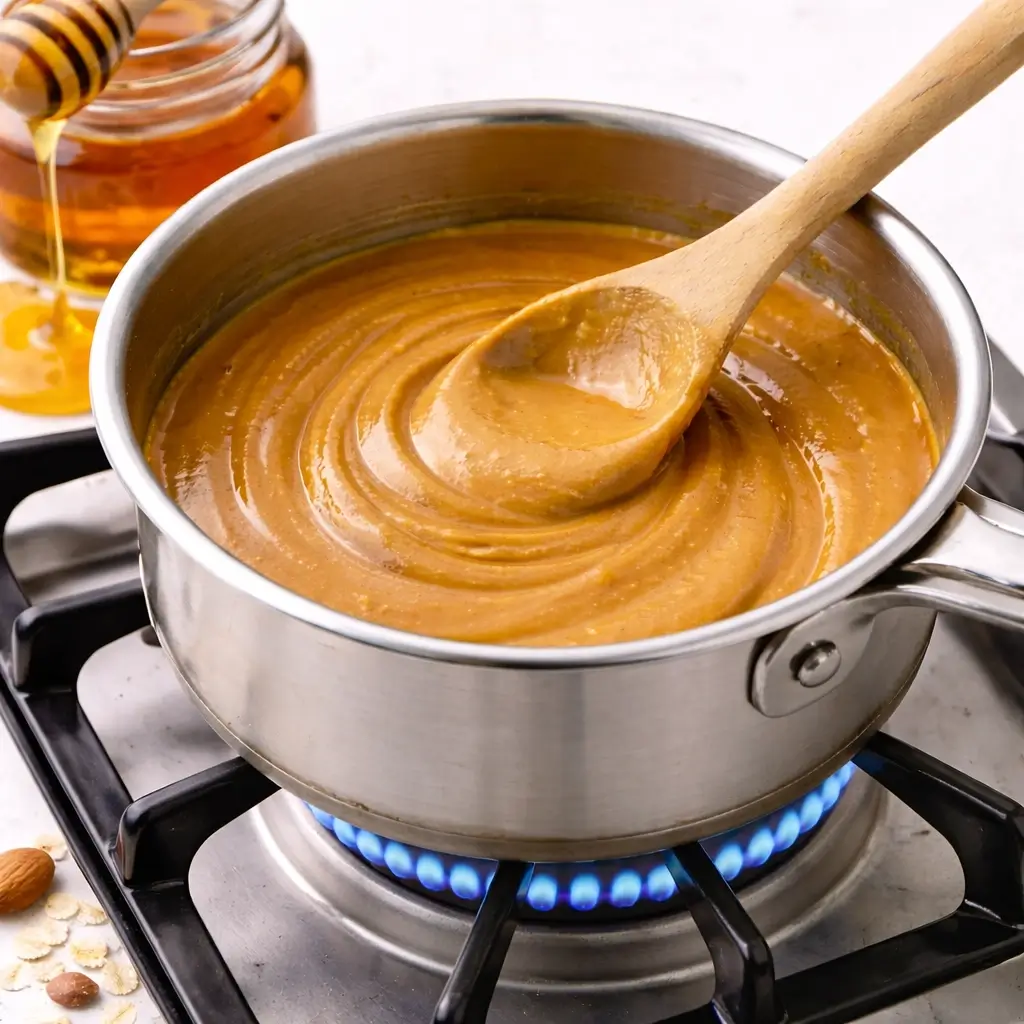
- Remove from the heat and let it cool slightly to avoid melting your chocolate chips if using.
Combine and Mix
- Add oats and any optional mix-ins, such as seeds or dried fruit, to a large mixing bowl and combine well.
- Pour the warm binding mixture over the oats. That blend thoroughly so every dry ingredient is coated.
Shape and Set the Bars
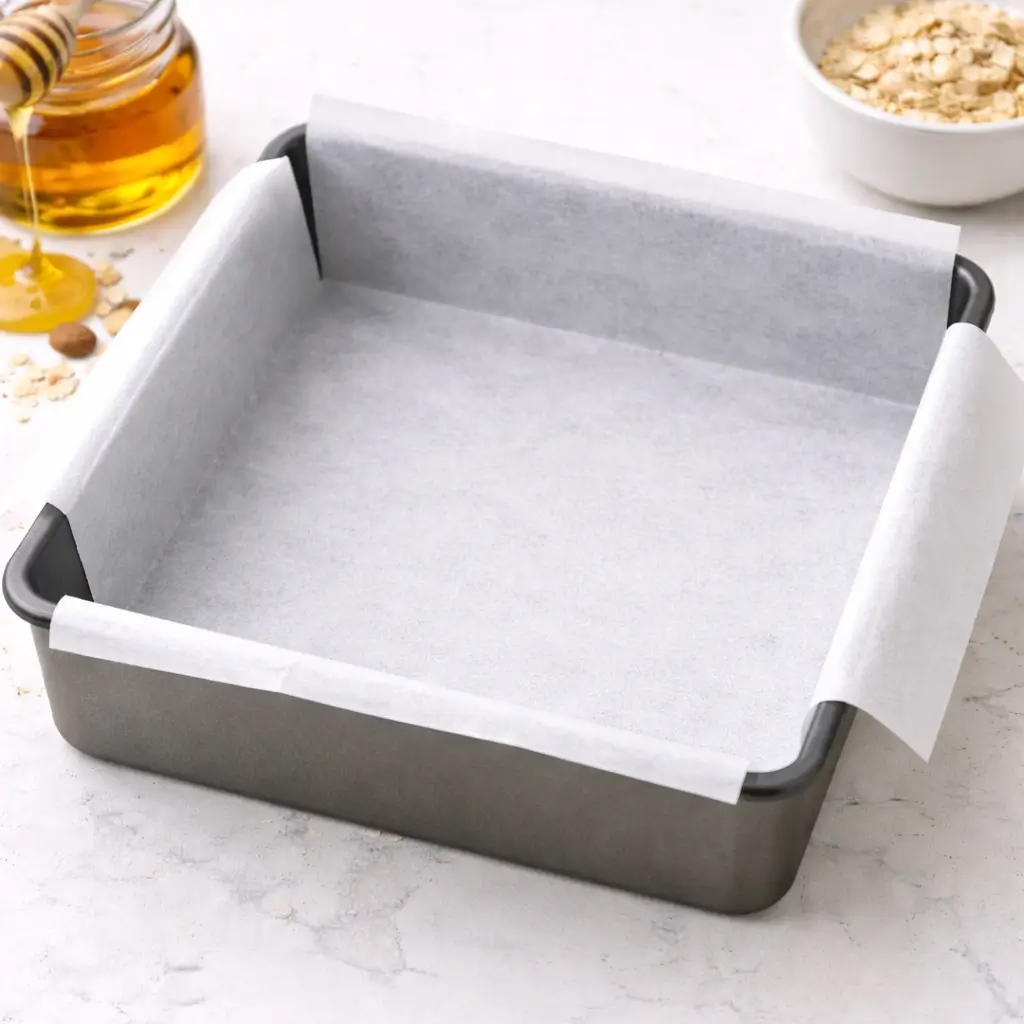
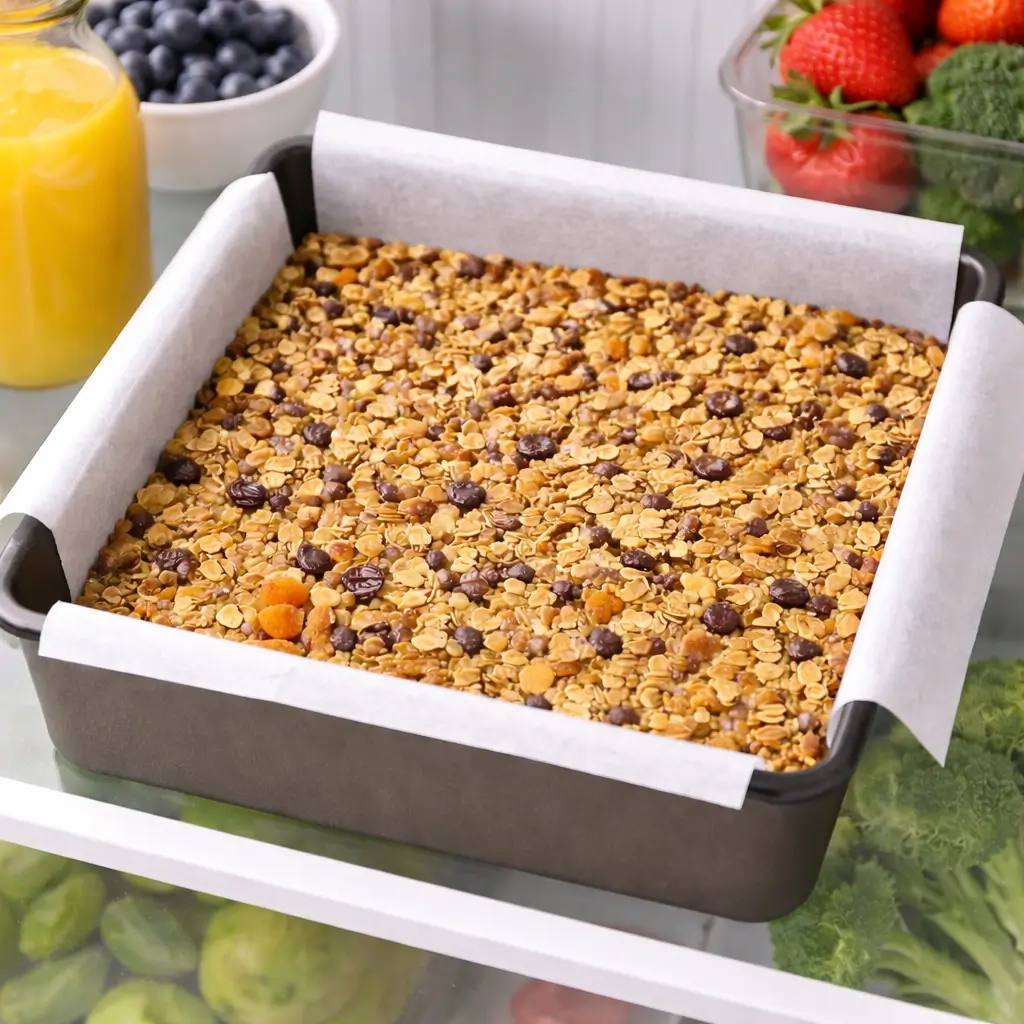
- Prepare the baking pan with parchment paper for smooth and easy removal.
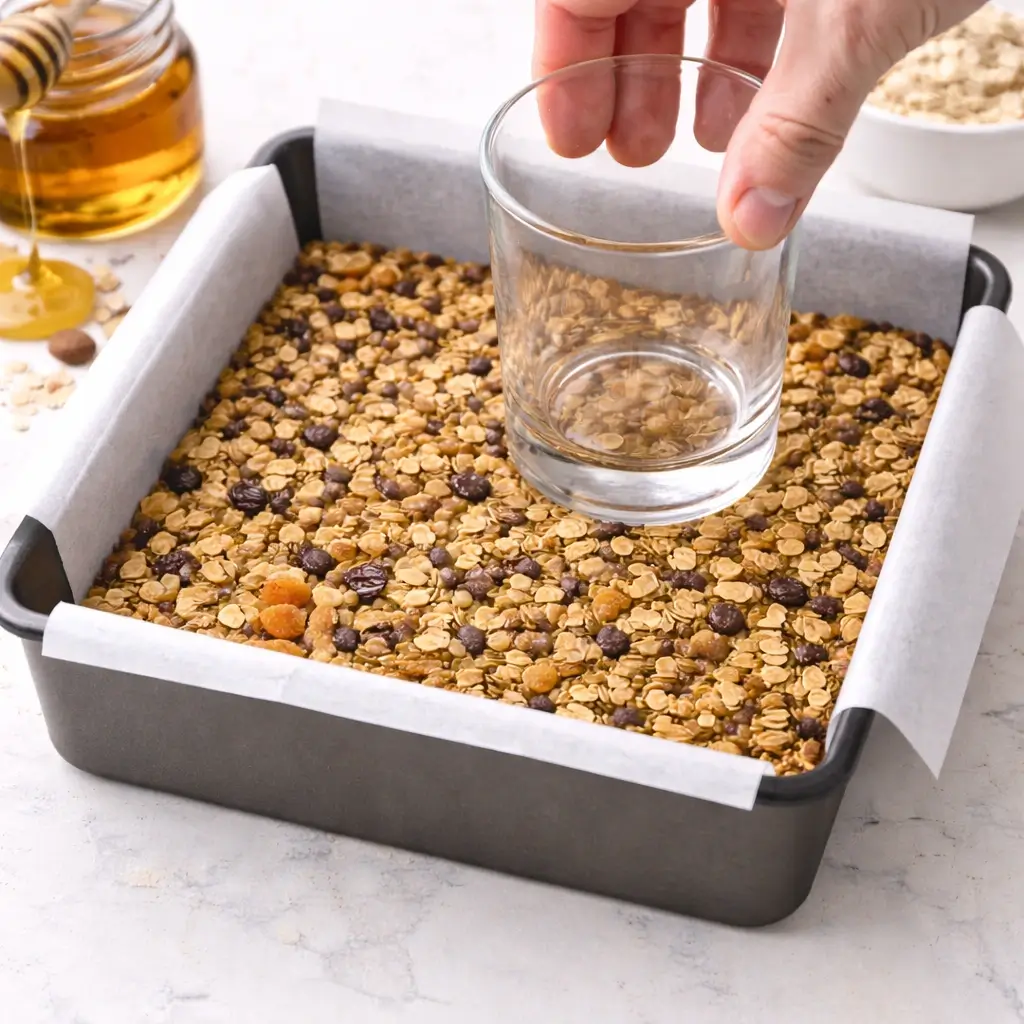
- Transfer the mixture to the pan and press it down firmly. Use the back of a spoon or a flat-bottomed glass to compact it well—this helps the bars hold together.
- Pan in the fridge for at least 2 hours, or until the mixture sets firmly.
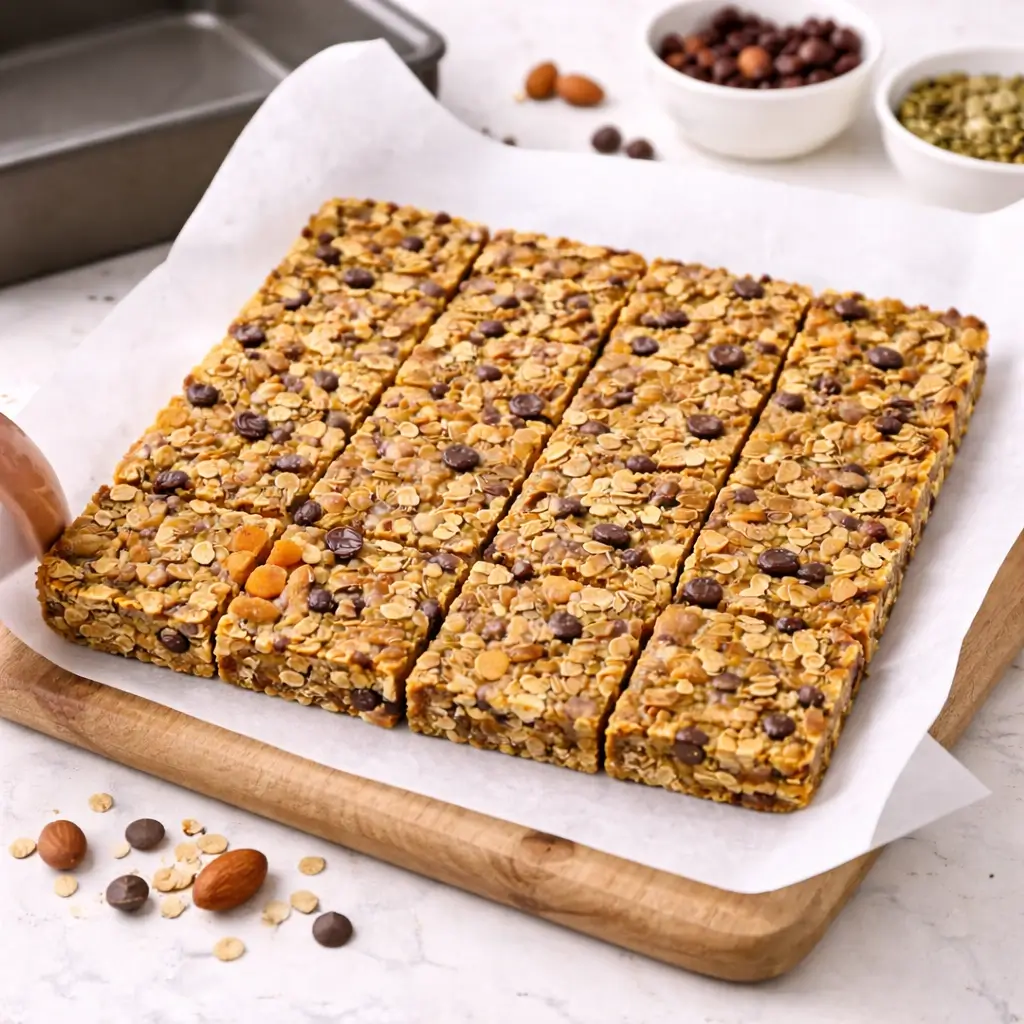
- Lift the set mixture from the pan using the parchment paper. Slice into bars or squares.
Expert Tips
- Use the Right Binding Ingredients: To keep their structure, No-Bake Granola Bars need effective binding ingredients. Nut butter, honey, or maple syrup works very well. These ingredients hold the mixture together and stop the bars from falling apart after setting.
- Choose Better Quality Oats: Fresh rolled oats of good quality help create the ideal texture. Rolled oats give a chewy and satisfying bite. Quick oats can be used, but they make No-Bake Granola Bars softer in texture.
- Mix Ingredients Thoroughly: Ensure all the ingredients are evenly combined before pressing the mixture into the pan. This ensures every bite has balanced flavor and texture. Proper mixing also helps the bars hold together better once chilled.
- Press the Mixture Firmly: Press the mixture very firmly into the pan using a spoon, spatula, or your hands. It is necessary to make strong and compact bars. A strong press ensures No-Bake Granola Bars remain solid and do not crumble easily.
- Chill for Enough Time: Refrigerate the mixture for at least 1–2 hours before cutting. This allows the ingredients to firm up properly. Cutting too early can cause the bars to fall apart or lose their shape.
- Cut with a Sharp Knife: Use a sharp knife to cut clean and even bars. Wipe the knife between cuts if needed. This keeps the edges neat and makes the bars look more attractive and professional.
- Store Properly for Freshness: Keep the bars in an airtight container in the fridge. Proper storage keeps them fresh, firm, and tasty for several days. Well-stored No-Bake Granola Bars are always ready to enjoy whenever you need a quick snack.
No-Bake Granola Bars Variations
- Chocolate Chip Peanut Butter Bars: This version combines creamy peanut butter with sweet chocolate chips for a rich and satisfying flavor. The peanut butter adds smoothness, while the chocolate brings a delicious sweetness. These No-Bake Granola Bars are perfect for anyone who enjoys a classic chocolate and peanut butter combination.
- Cranberry Almond Bars: Add dried cranberries and chopped almonds for a fruity and crunchy twist. The cranberries add a mild, tangy flavor, while the almonds bring a crunchy texture. This variation makes No-Bake Granola Bars more flavorful and enjoyable with every bite.
- Coconut Chocolate Drizzle Bars: Mix shredded coconut into the base and drizzle melted chocolate on top. The coconut adds a tropical taste, and the chocolate makes the bars look and taste more special. This version is great for those who love coconut desserts.
- Nut-Free School-Safe Version: Replace nut butter with sunflower seed butter or another seed-based option. This keeps the bars safe for school and suitable for those with nut allergies. These bars still taste delicious and hold together well.
- Honey and Seed Energy Bars: Use a mix of seeds such as pumpkin, sunflower, and chia seeds for added nutrition. Honey helps bind everything together and adds natural sweetness. This option creates No-Bake Granola Bars that are both healthy and energizing.
- Fruit and Nut Delight Bars: Add chopped dried fruits such as raisins, apricots, or dates along with nuts. This creates a naturally sweet and chewy texture. It also adds more variety and nutrition to the bars.
- Dark Chocolate and Sea Salt Bars: Mix in dark chocolate pieces and sprinkle a little sea salt on top. A touch of salt brings out the richness of the chocolate and adds perfect balance. This variation is perfect for a richer and more gourmet snack experience.

Storage and Shelf Life
- Room Temperature: Store in a cool, dry place for up to 3 days if your kitchen isn’t too warm.
- Refrigeration: Keep bars in the refrigerator for up to 2 weeks for maximum freshness.
- Freezing: Use parchment to wrap each bar, then store them in a freezer-safe bag for up to 3 months. Thaw at room temperature before eating.
- Best Containers: Use airtight containers or resealable silicone bags to prevent bars from drying out or absorbing odors.
Serving Suggestions
- Breakfast Pairing:- Serve a bar with Greek yogurt and fresh fruit for a balanced breakfast.
- Lunchboxes and Trips:- Pack bars in lunchboxes, picnic baskets, or road trip snack packs.
- Workout Fuel:- Keep a few in your gym bag for post-workout recovery.
- Office Snack: Store in your desk drawer for a mid-afternoon energy boost.

Frequently Asked Questions
Why are my no-bake granola bars falling apart?
Pack the mixture down hard and chill until set. If it seems loose, add a bit more honey or nut butter for better binding.
Can I make these bars vegan?
Yes! Use maple syrup or agave nectar instead of honey, and check your chocolate chips for dairy-free options.
How can I make the bars less sweet?
Reduce the sweetener slightly or add more oats or seeds to balance the flavor.
Are no-bake granola bars healthy?
They can be very healthy, especially when using natural sweeteners, whole grains, and nutrient-rich mix-ins.
Can I add protein powder to these bars?
Yes. Add a scoop of your favorite protein powder, but you may need to add a little extra nut butter or honey to sustain the right consistency.
How long do they last in the freezer?
Properly wrapped, no-bake granola bars can last up to 3 months in the freezer.
Recipe Card
No-Bake Granola Bars
Ingredients
• 2 ½ cups old-fashioned rolled oats
• 1 cup nut butter (peanut, almond, or cashew)
• ¾ cup honey or maple syrup
• ½ cup chopped nuts (optional)
• Use ½ cup of dried fruit such as cranberries, raisins, or apricots.
• ¼ cup mini chocolate chips or cacao nibs, if desired.
• Pinch of salt
Instructions
1. Cover an 8×8-inch pan with parchment paper before adding the mixture.
2. Lightly toast oats in a skillet over medium heat for 3–5 minutes until fragrant. Let cool. (Optional)
3. In a saucepan, heat nut butter and honey over low heat until smooth and combined. Remove from heat.
4. In a large bowl, combine oats, nuts, seeds, or dried fruit.
5. Pour the warm nut butter mixture over the oats and stir until everything is evenly covered.
6. Transfer the mixture to the prepared pan. Press down very firmly with a spoon or spatula.
7. Chill in the fridge for 2 hours or until the bars are solid. Lift out, slice into bars, and enjoy.
Notes
- Use certified gluten-free oats for gluten-free bars.
- To make it vegan, swap the honey for maple syrup or agave.
- Pressing firmly is key—use the bottom of a glass for best results.
- Add a scoop of protein powder for a protein-packed snack.
- Separate layers with parchment when storing to prevent sticking.
- Pour melted chocolate on top for an extra delicious touch.
- Keep in a sealed container in the refrigerator for up to two weeks.
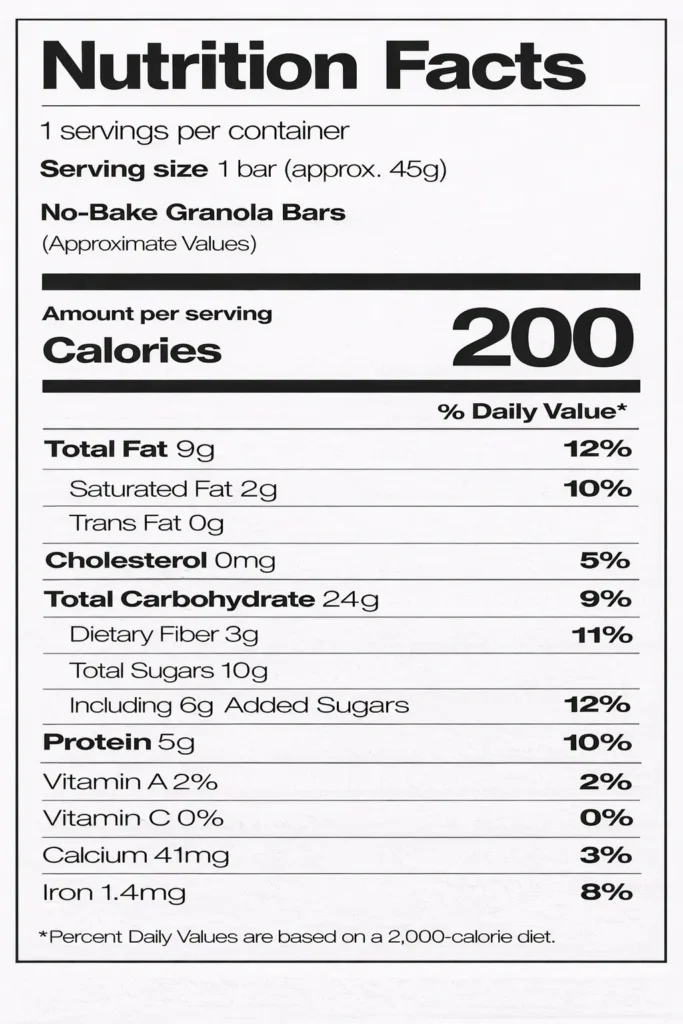
Nutrition Facts (Approximate Values)